 Чт, 22 сен 2016 Автор: Ксения Рахимова
Furniture for the interior of the house is not necessary to buy in expensive
мебельном магазине: ее можно сделать do it yourself за несколько
hours
Wooden chair, of course, make more difficult, but soft and
comfortable ottoman – in a few simple steps.
The main element of today’s master class will be plastic
bottle. She needs to stock up in large quantities.
Contents
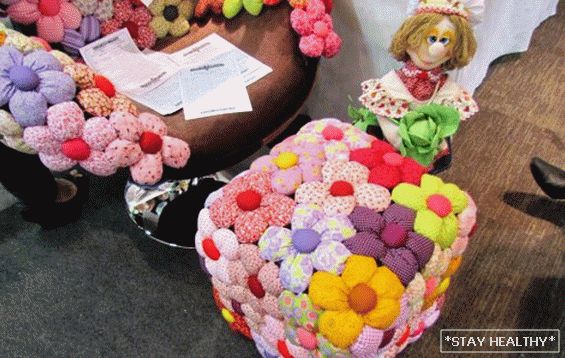
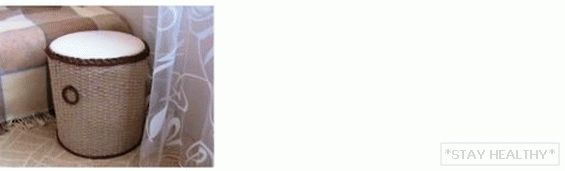
Дизайнерский меховой пуфик do it yourself цвета красного
the blame
Such an unusual ottoman will be a bright accent in a dim living room.
Cats will surely love him if they live in a house. And he
safe for children – soft, fluffy and light.

Materials and tools: plastic bottles with lids, cloth
for upholstery, fur, adhesive tape, thick cardboard
boxed, foam rubber, lightning (tractor lock) 2 pcs., needle,
thread, sewing machine, scissors, tailor meter.
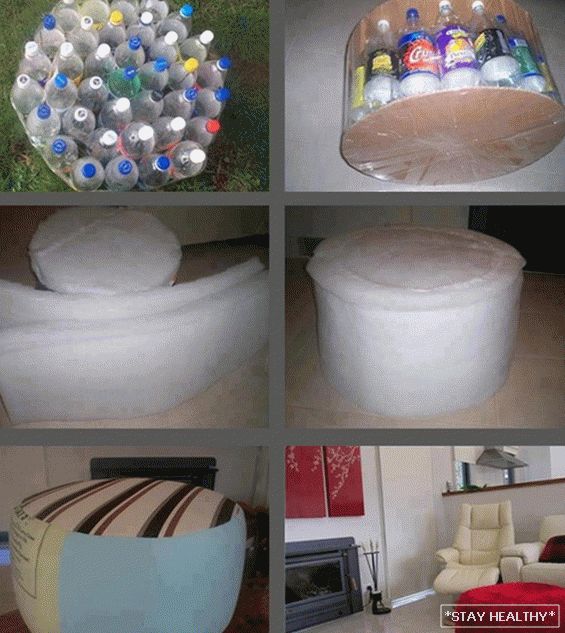
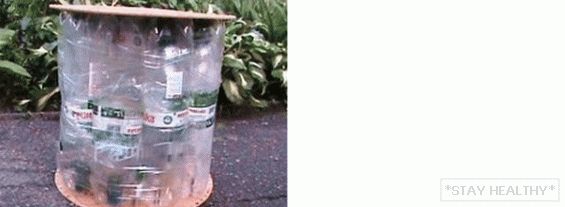
Stage 1
Using adhesive tape, all bottles are held together in
hexagon shape. If you prefer, you can choose a simpler form.
– round. In this case, in one central bottle join
circle the rest. It turns out two rows, not counting the central
the bottle. It is important that each bottle is glued to the next.
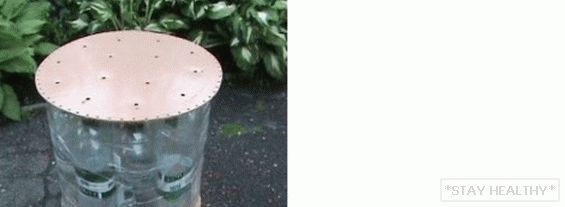
Stage 2
A circle is cut out of the cardboard for the upper base and the lower one. Have
it should be a protrusion outside the circle of bottles of about 4 cm. This
the distance is necessary for the subsequent insertion of foam rubber.
The cardboard bases are glued to the adhesive tape as shown.
on the picture.
Stage 3
A circle is cut from the foam rubber with an allowance of 10 cm. Better to do 2
or three layers of foam for the upper side of the ottoman from the bottle,
сделанного do it yourself.
Foam rubber is sewn by hand to cardboard.
Stage 4
Cut a rectangular shape of foam rubber for upholstery from the side.
the edges. You can make 2 layers. With the help of thread and needles material
sewn to the future ottoman. Here, too, everything is simple.
Stage 5
Upholstery patterns are cut from the fabric. Should get two
circle and one long rectangle. Tractor lock recommended
Sew on the side of the lower circle. All these manipulations are done.
through the sewing machine.
Stage 6
Their fur is sewn similar form, which was made of cloth
for upholstery. Lightning is also better to sew the bottom of the ottoman. If sew
from the top, then on the upper bend of the ottoman the castle will be visible and it will be
look not very beautiful. Fur pile on the sides is better to send in
side of the floor. So the fur will not be ruffled and will become noble
shine and shine.
Пуфик из бутылок с плетением do it yourself
Such ottoman will fit perfectly into the interior of any corridor. Be
this apartment or country house. Sitting comfortably on it
wear shoes before going out.
Materials and tools: plastic bottles with lids, solid
cardboard for boxes or thick leather, adhesive tape, linen (fabric for
upholstery), heat gun with glue, foam rubber, lightning,
construction stapler, scissors, knife, self-tapping screws, drill,
old newspapers in large numbers to create wicker
tubules.
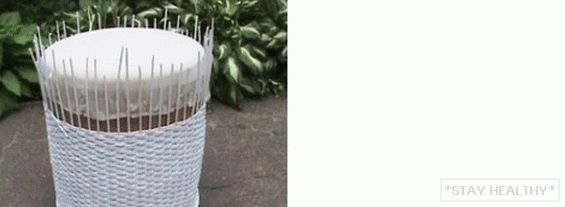
Stage 1
Внимание, на фото использованы длинные
bottles that may not be sold in all regions.
Therefore, you can use plastic bottles of 1.5 liters. But,
to give the future ottoman an elongated shape, as in the photo,
It is required to make 2 floors of the bottles. For this, each bottle
1/3 of the spout is cut off. This little cut off
the piece is inserted into the trimmed bottle. Spout cover should
rest against the bottom.
Stage 2
One whole bottle is inserted into the bottle with the cut-off spout.
spout down.
Stage 3
Next to one of these collected bottles pasted another on
adhesive tape. And so is going to the round shape of the bottle in two
ряда, не считая центральной the bottle.
Stage 4
If in work bottles of 1,5 liters are used, then
it is required to make the second floor in the same way as the first,
relatively speaking.
Stage 5
Оба условных этажа скрепляются между собой на adhesive tape.
Stage 6
Circles are cut out of cardboard or leather for the upper base and
lower. They are attached to the bottle design on self-tapping
screws.
Stage 7
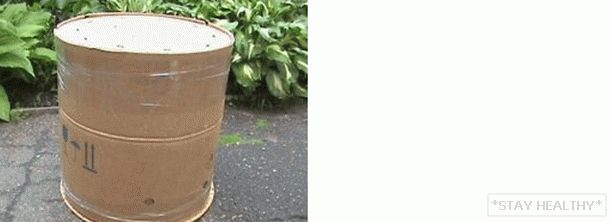
Вся получившая конструкция будущего пуфика do it yourself
wrapped in thick cardboard. It is also bonded.
taped.
Stage 8
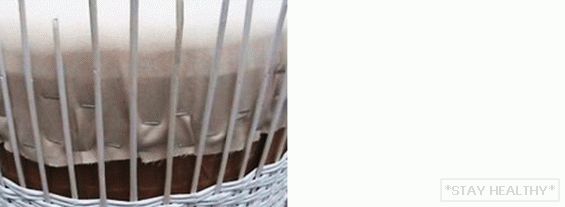
A circle is cut from the foam rubber over the diameter of the upper base.
padded stool. On it you need to lay flax on top. Flax will be upholstered
cloth. Its edges are bent downwards and fasten with a construction stapler.
on the cardboard wall.
Stage 9
From old newspapers are made tubes for weaving,
imitating the vine. They are wound in a wet spiral.
on the knitting needle. On him is a brush with a thin layer of glue.
Additionally at this stage you can change the color of the future vine,
adding acrylic paints or gouache. The tubes are dried. Spokes
can be removed.
Stage 10 – плетение
Vertically laid newspaper tubes. On the bottom they
sealed with a heat gun.
Stage 11
Then you can proceed to the horizontal weaving.
Stage 12
All vertical protruding tubules are cut off. Around the perimeter
braid weaving is made.
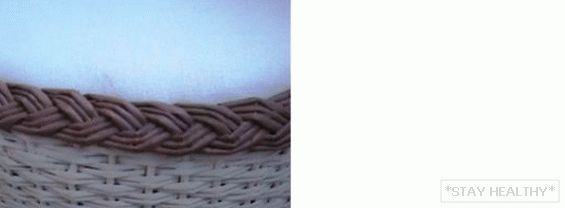
Stage 13
Пуфик из бутылок, сделанный do it yourself, можно декорировать
round handle. It is made of a metal ring,
braided in a circle painted newspaper.
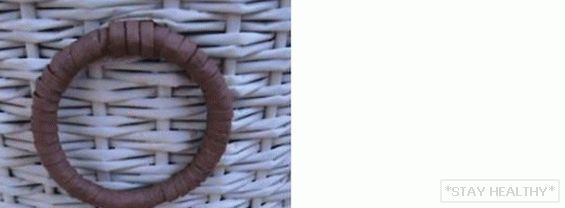
It is recommended that the product be slightly varnished. It will make him less
affected by moisture and water.