 Пн, 01 авг 2016 Автор: Павел Якименко
The range of satin ribbons is striking in its diversity. Tapes
have a different width, color, pattern, finish. This material is available.
priced and easy to use, with satin ribbons
hands can make very beautiful products. In this article, we
we offer several master-classes on how to create simple bows
for every day, and elegant, festive bows.
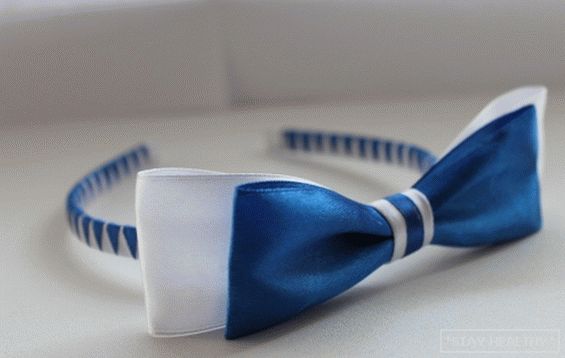
Consider first the easiest ways to tie a bow.
Although, at first glance, it seems that to tie a regular bow is very
it is easy, yet there are some tricks in this process. We’ll consider
a way that will allow you to get a smooth symmetrical bow with
beautiful middle. For this you need only satin
tape and scissors.
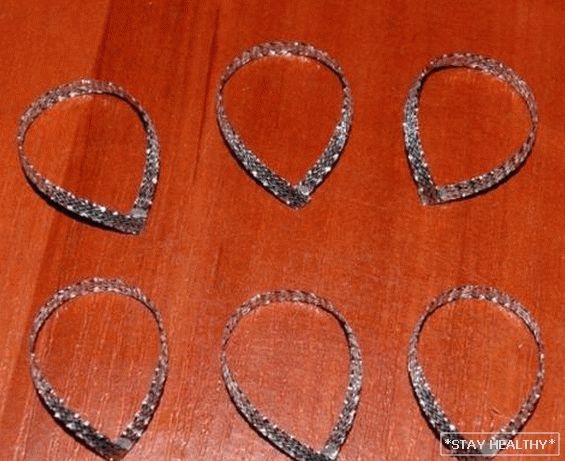
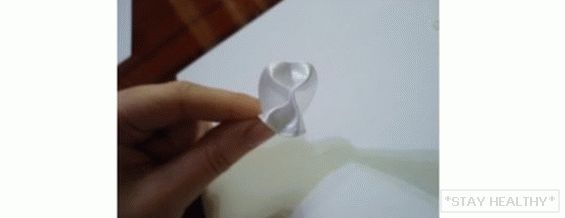
1. Take a piece of tape of the desired length.
2. Fold the tape in the image shown.

3. In the loop below, we skip one of the ears and
tighten the knot.
4. This is what should happen.

This simple bow is suitable for decorating hair for every day.
For example, to diversify with a bright ribbon the usual horse tail or
spikelet.
Contents
Flower satin ribbon bow. How to do it yourself?
Now consider the festive options for satin bows.
Making them will be a little more difficult, but the result is noticeable
more spectacular. Lush bows for satin ribbon hairstyles can be easily
do it yourself. In this case, the cost of the product at times
less than the price of a bow shop. The diameter of the finished product
will be 14 cm if you want to get products larger or
smaller diameter, then proportionally change the size of the segments
tapes.
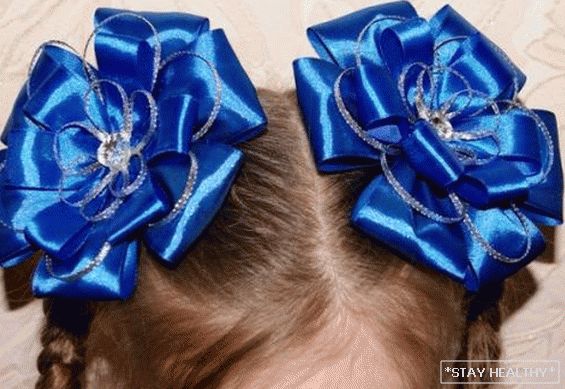
So, to make such a satin bow with your own hands,
you need:
• six cuts each:
– satin ribbon 5 cm wide, 14 cm long;
– tapes 2.5 cm wide, 10.5 cm long;
– silver tape 0.3 cm wide, 15 cm long;
– silver tape 0.3 cm wide, 8 cm long;
• a circle of felt with a diameter of 5.5-6 cm;
• decoration for the middle of the bow;
• thread to match, needle, scissors;
• lighter or soldering iron, glue gun or glue
moment-crystal;
• elastic, barrette or clip for the base.
Before assembling the bow, be sure to cut the edges.
pieces of a lighter, so that in the process they are not rained.
Fold 6 pieces of 5 cm in half in half and collect them on
double thread, pull the thread so as to make a flower and
secure.
Similarly, make a second flower out of 2.5-inch ribbon segments.
see. Then follow the ears from pieces of silver tape, like
shown in the picture. Glue the tips with glue or glue
a pistol.
On the big flower glue big silver ears, on
one petal, so that they are beautifully peeking out from under
top flower.
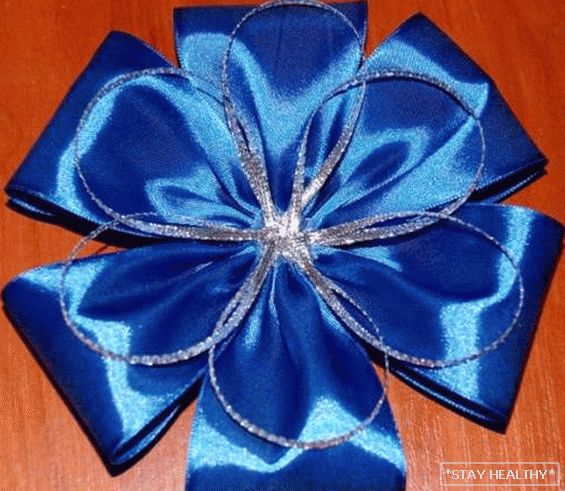
Glue the second flower on top and the smaller ears on it.
by the same principle. Core close the prepared ornament.
Suitable bead, buttons, medallion.
On the back of the bow glue a felt circle, and on
His mount – gum, for example. If you will use
clip or barrette, glue them with a rep ribbon tape in
tone.
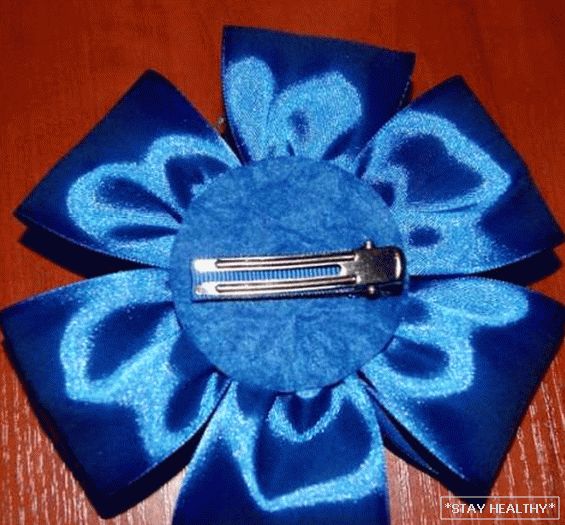
Your bow is ready. It took less than an hour to make
Elegant satin bow do it yourself.
Gorgeous satin ribbon bow decorated with rhinestones
How to make your own hands this wonderful decoration will teach in
master class. This version of an elegant bow that you can
Perform independently, will please any first grader. Smart
an unusual bow is done very simply, but on its implementation
it will take more time since it consists of a large
number of parts. Pay attention to what you need carefully
complete each blank, since the overall appearance of the bow depends on
how well each element is made. If you don’t have
skill work with satin ribbons, prepare materials for 5-7
extra blanks.
Materials for work:
• tape 2.5 cm wide and 6 meters long;
• rhinestones or beads with a diameter of half a centimeter;
• lighter or soldering iron, scissors, moment-glue glue,
ruler, pencil;
• a circle of felt with a diameter of 5 cm, mount – gum or
barrette.
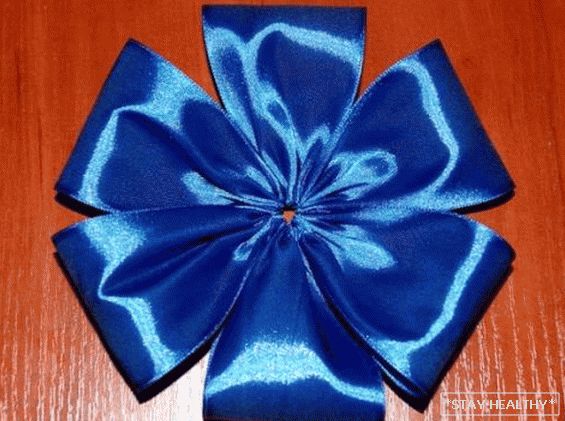
Cut approximately 50 pieces of tape length eleven
centimeters, process the edges of the pieces with a lighter. We fold
each piece in half, satin side inward, dripping small
a drop of glue on the satin side at a distance of 2-3 centimeters from
fold in the middle and press with your fingers. When the tape adheres well,
we twist its satin side out. It turns out this
detail.

Then we fold this part in the form of a bow, so that the glued
the zone was in the center, and the edges of the tape were folded to it from the back
parties.
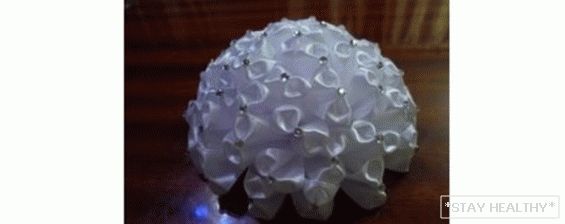
We decorate the blank with rhinestone or bead. Do no less
fifty such details. This is the most important stage of work, if immediately
did not work neat preparation, we advise a little
practice before performing the “finishing” parts.
When the parts are ready, we collect the bow. On the felt circle begin
glue around the workpiece with a little overlap. Must
fit 11-14 pieces in the first lap.

The second and subsequent circles are sticking in the same way,
slowly moving to the center of the felt circle, the number
items in a row will shrink as you get closer to the center.
So you should have a few laps, gradually
decreasing in diameter.
The more elements, the bow will be more magnificent. After all
blanks will be glued, we attach a rubber band or barrette with
using glue or glue gun, you can add tapes for
tying. Bright lush bow ready.
These bows will surely please your little ones.
princesses. They can decorate the hair and on weekdays and on holiday, with
these accessories beginner women of fashion will look elegant and
neatly. And you will save on the purchase of hair accessories. Can,
for example, to please the first grader so necessary and beautiful
a gift on the first of September, or make a gift for the day
of birth.