 Вт, 02 авг 2016 BUTвтор: Ирина Унжкова
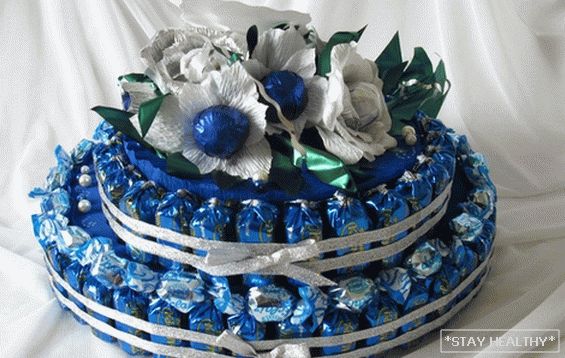
Beautiful cake made of sweets, especially not purchased, but made
with his own hands will win the hearts of not only children, lovers of sweets,
but will conquer any adult.
After all, the sweets on the shelves are full, and surprise your
loved ones and relatives quite difficult. But with a cake of sweets
hands everything is possible!
Contents
Nuances of making a cake of candy with their own hands,
step by step
Moreover, such a product can be eaten quite long and
not to be afraid of the fact of spoiling the culinary product, for its storage even
no fridge needed.
A variety of recipes for such a masterpiece, a lot. Features
such a cake are the shape of the product, the type of candy used, for
its preparation, their location and the functions that they will
Perform as the main ingredient of this product.
Important! Do not use for making such
kind of cake chocolates without wrappers. Since it is not hygienic, and
just ugly.
In addition, picking up candy to create such a masterpiece,
it is necessary to take into account the preferences of those who will eat it
delicacy. If a person is allergic, sweets with
nuts or any filler.
To complete the look of a sweet product, it must be decorated.
different decor in the form of – fabric, foil, ribbons, beads, glitter and
artificial flowers.
How to make a delicacy cake made of sweets with your own hands,
step by step
Would need:
• Candy (chocolate).
• Styrofoam.
• A box of round-shaped cookies.
• “Raffaello” – box of sweets produced by Italian
manufacturer.
• Corrugated paper.
• Scissors, beads and glue.
• Foil sheet.
• Sticks and candles.
• Colorful fabric.
Instruction
Step 1. The bottom layer for the future cake should be cut out
foam plastic. It must be larger than the next culinary layers.
products. The edges of the foam must be treated with sandpaper,
for the smoothness of the bottom layer of the cake and glue it with a bright cloth.
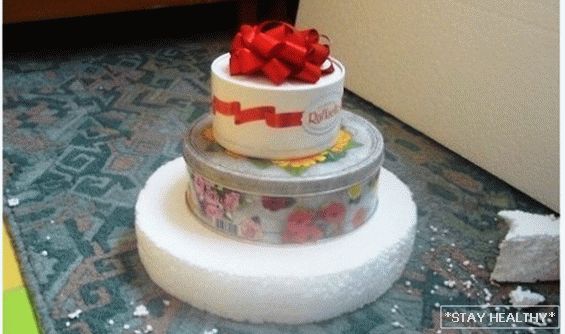
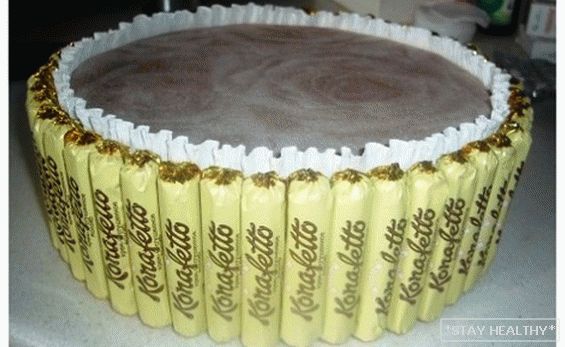
Step 2. The next layer will be a box with cookies, which
it is necessary to glue the bright matter with the help of double-sided
scotch tape Next, you need to cut a strip of corrugated paper.
about 5 cm wide and stick it on the middle layer in the form of a frill. BUT
then secure the chocolate sweets from the sides using scotch tape.
Step 3. For the lower tier of the cake strip of corrugated paper
need to cut just above the base, sticking it to the foam
при помощи scotch tape BUT верхние края бумаги необходимо растянуть для
getting some shuttlecock. Butt between base and flounce
It is recommended to glue beautiful beads with glue. Boca same
decorate sweets.
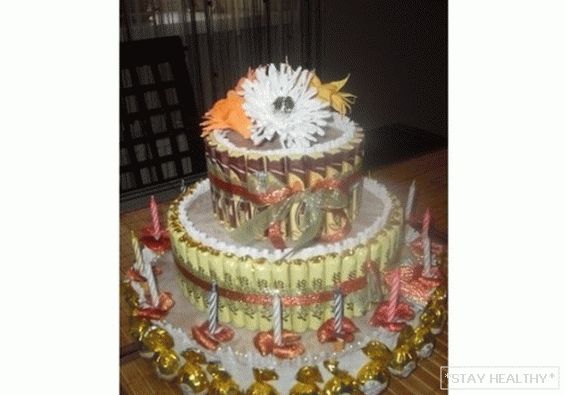
Step 4. The top layer of newly minted cake in the form of a box
�”Raffaello” need to paste over the matter, secure the corrugated paper
and stick the candy. The resulting three layers need separately
wrap bright ribbons and tie in the form of bows.
Step 5. It is recommended to decorate the lower tier of the cake with candles, and
decorate the last layer with flowers. Candles need to be stapled with
половинками зубочисток при помощи scotch tape
Step 6. From paper, such as foil, you need to cut the petals to
florets. From the petals glued to the tape must be formed
flower. The edges of each petal with a pencil recommended
bend down. And after so prepared candles
must be fixed on the lower tier of the cake.
«Корзиночка» – торт из конфет своими руками, step by step
For making baskets a simple version of the cake from
candy with your own hands, you need:
• Cardboard and double-sided tape.
• Corrugated paper.
• Glue.
• Chocolates (long) going to the base.
• Candy for filling baskets.
Instruction
Step 1. According to the length of the chocolates chosen for the basis of the future cake,
cut a rectangle out of cardboard which when using glue
must be turned into a cylinder. From one side to the cylinder
it is necessary to attach the bottom of a round form of cardboard, the base
glue over corrugated paper. Tails of candy wrappers
It is recommended to glue, directing them in one direction.
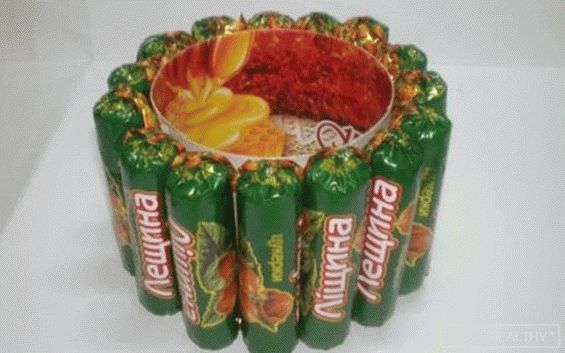
Step 2. On the cylindrical base need to stick two strips.
scotch, on top and bottom of the future baskets. Secure on them
Candy tails inside and preferably closer to each other.
The satin ribbon of the desired tone, matched
in bow
Step 3. Next, you need to attach the handle, making it out of solid
cardboard and decorate candy weight on weight. Then more expedient
decorate the pen with paper, and then candy, ribbons and various
tinsel
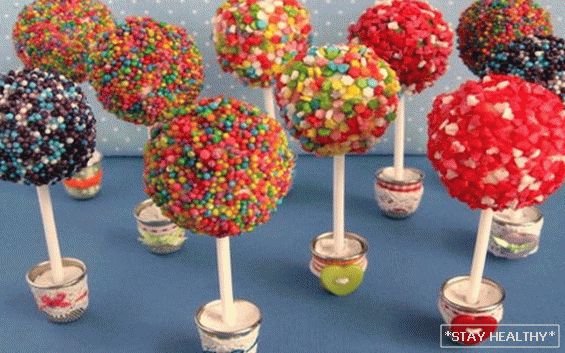
�“Original tree” – a cake made of sweets with your own hands,
step by step
Such a tree can be created using candy for crafts.
Chupa Chups or applying other sweets on sticks.
It will take:
• Candy on sticks.
• Plasticine (edible).
• Varied dressing.
• Thimbles.
• Ornaments for pots.
• Gypsum and water.
Instruction
Step 1. You need to stick the candy in a thimble and strengthen it
with plaster, clay or dough. Next, you need to give time
hardening material.
Step 2. Then you need to remove the wrapper from the candy, and from the edible
plasticine to form a ball of rounded shape.
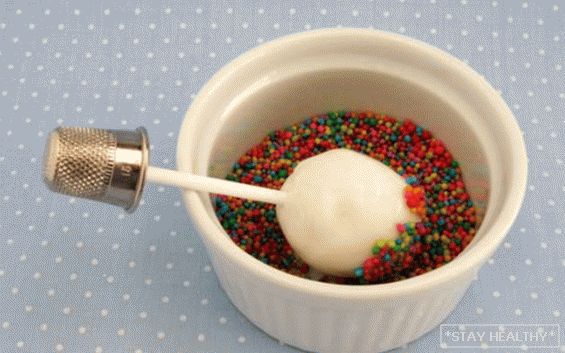
Step 3. After wetting the candy with some water you need to dip it in topping.
so that all the little details stuck to it.
Step 4. And finally, it is necessary to decorate the thimble with foil,
ленточками и другой tinsel