 Ср, 18 янв 2017 Автор: Марина Ивасюк
When my beloved mother has a birthday, I want to give
her something special. The best gift for the mother is the one
a gift that is made by the hands of her beloved children.
Today’s master class is devoted to gifts for mothers on the Day
Birth with your own hands.
Contents
A gift to mom for a birthday with their own hands: a sweet bouquet
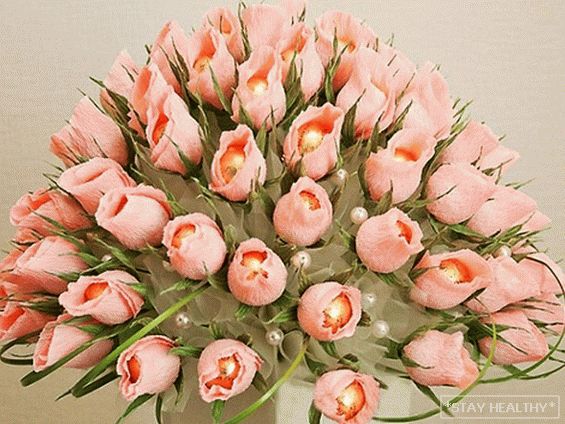
This bouquet is made of paper and candy. Such flowers never
spoil, and bring great aesthetic pleasure.
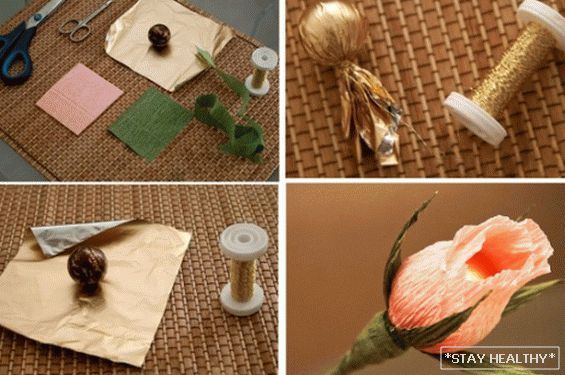
To work on this bouquet, you will need the following materials
and tools: colored wrapping paper or foil preferably
gold color, gold thread, crepe paper, candy,
wire and scissors.
Corrugated paper should be of two colors: that color,
which you want to make a flower and green for foliage. Candies
preferably round and always tasty, because giving them
will be the dearest person in the world.
Stage 1
Color corrugated paper for a flower and a foil cut in
squares measuring 10 × 10 cm., and green crepe paper
for foliage with stripes measuring 5 × 7 cm or the same squares
10 × 10 cm. Also cut green from corrugated paper
strips 1-2 cm wide, and 15-40 cm long.
One candy will need two colored squares of the same
colors for flower decoration, one green square for decoration
foliage and one long thin strip for the stem.
Stage 2
Wrap candy with foil so that the gold color is on
surface. The foil should fit snugly without formation
folds. Twist the free edge of the foil into an elongated spiral under
candy.
Attach one end of the wire to the resulting tip, and
leave the free end long. The length of the free end is equal to
the length of the flower and you should determine it at your discretion, but
so that it was not less than 15 cm and not more than 30 cm.
Stage 3
Fold the two colored squares on top of each other. On one side
cut the two corners in the shape of a semicircle. Creases on crepe paper
should be located along the leaf of the flower, and not across.
Stage 4
In the resulting double piece of paper, put the candy and roll
him in the flower. Candy should be placed twisted edge down, and
smooth side peeking between flower petals. Tightly
squeeze the crepe paper by pulling it to the base of the candy
gold thread.
Stage 5
One edge of a strip of corrugated paper green cut into
form of sharp triangles or teeth. The pattern should go through
the entire side of the strip. The length of one tooth will be equal to the distance
from the edge to the middle of the strip. Wrap the base of the flower with it, so that
the teeth would look up.
Stage 6
Tightly закрепите края бумаги друг с другом у основания цветка
with a gold thread and wrap a thin stem of wire
a strip of corrugated paper green. Single flower
is ready.
For a full lush bouquet will need from 30 to 50 colors.
To make the bouquet not lose its shape, and the flowers do not crumble, combine all
stalks into one with green corrugated paper and yarn or
scotch tape
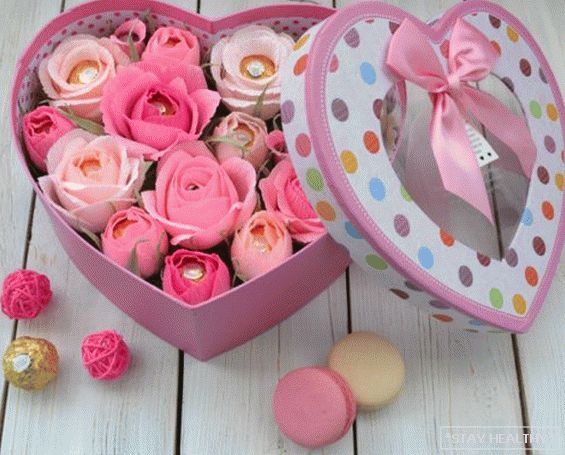
Decorated in the same style of candy can be arranged not in
bouquet, and in a beautiful gift box with a lid. Flowers
laid out in one layer of the fabric tightly to each other.
Birthday gift for mother: topiary
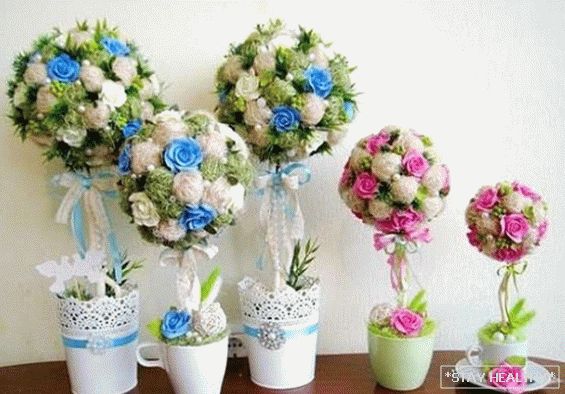
Some people call topiary a symbol of prosperity, and others
�”Tree of happiness.” It always looks the same: a ball decorated
flowers, candy or other patterns, “growing” from the floral
pot on a long leg.
In order to make such a birthday present for your mother
need: newspaper, thread, glue, scissors, satin ribbon, tube
for a trunk length of 15-25 cm, and a diameter of 1-2 cm, small
flower pot, waste glass or glass vase, handful
real or decorative stones and crown jewelery
topiary.
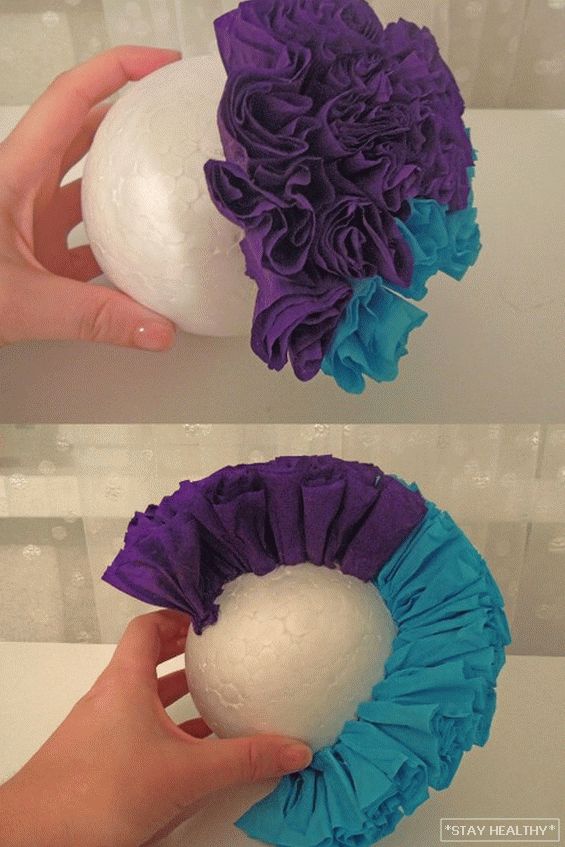
First you need to make a ball, which will later be
serve as the crown of the tree. It will be the basis on which to attach
flowers, candy or other decorations.
Stage 1
Crumple up a newspaper in a tight ball and wrap it straight from above.
sheet of newspaper. Tightly обмотайте комок нитью со всех сторон, что бы
turned tangle. Smear it with white glue to fix the thread.
Leave the ball in a warm place until the glue is completely dry.
Stage 2
Tightly обмотайте ножку для топиария атласной лентой в виде
spirals along the entire length. Secure the tape with tape at the ends.
tube so that she would not unwind back.
Stage 3
Make a hole in the coil with a knife and insert it into it.
already wrapped leg. The deeper you can push it
inside the ball, the stronger the tree will stand.
Stage 4
Prepared in advance decorations for topiary paste on
surface of the ball with instant or hot glue.
The decoration elements are attached to each other tightly, so that between them
there were no gaps.
As a decoration ball topiariya you can choose flowers
coffee beans, candy or flowers from sweets can be used
even folded elements of colored corrugated paper.
Stage 5
Put stones in a flower pot or glass vase and reinforce
they have a tree trunk. Топиарий is ready. Can add decoration
crafts rhinestones, beads, ribbons, bows and so on
infinity.
A gift to mother for a birthday with their own hands: a photo story

If you are ready for creativity and want to give your mom what she
never gave, then the collage photo-story is exactly what you
need to. It’s not just a bunch of random family
photos, and specially made for this holiday, carrying
certain meaning.
A prerequisite for this craft is that on each
photos have a piece containing an inscription or phrase. United
in a single chain these photos create whole sentences with
wishes or declarations of love for mom.
For work, you will need a drawing paper or its half, glue or
Scotch tape, pre-made special photos with tablets on
of them.
The phrases on the plates in the photos should convey the essence
congratulations or pleasant confessions.
Stage 1
Prepare a few sentences that you would like.
congratulate mom. And break them into fragments of phrases. Every passage
will be reflected in a separate photo, so write them in large
on A4 sheets with a marker or print on a computer.
Stage 2
Choose the area where you and those will be photographed
who wish to join the congratulations. On each photo
Change the inscription on the sheet until the plates run out.
Stage 3
Print the received photos in a photo salon.
Stage 4
Lay out the photo on the paper paper in the desired sequence and
приклейте их при помощи клея или scotch tape Collage telling about
вашей любви к маме is ready.