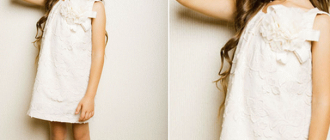
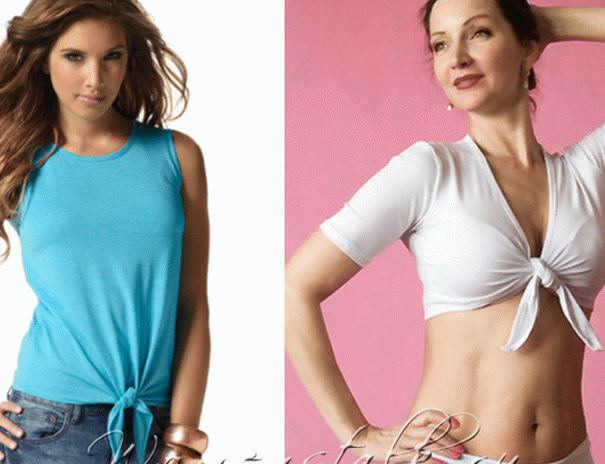
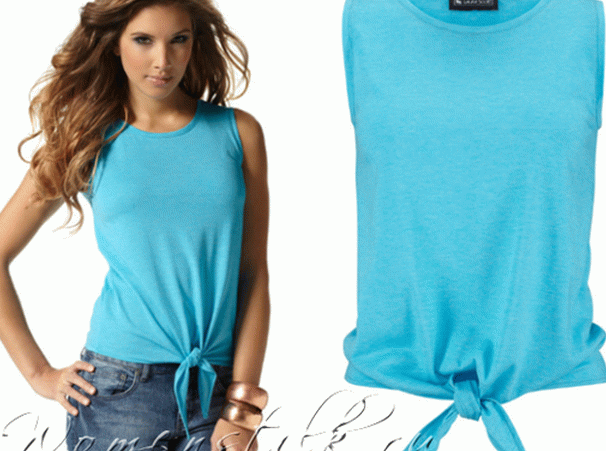
Good afternoon, we continue to model tops – we have already sewn classic top of a direct silhouette, as well as sewn a topic from lace guipure fabric with stretch lining. Today we will continue to sew from the stretch and make simple, but cute topics with ties on the knot. These tops are:
They are sewn from stretch fabric, so our ties easily stretch and tied in soft strong knots.
So, let’s get started … start with a blue top.
Contents
WE SIMULATE A TOP WITH PATTERNS DOWN BELOW
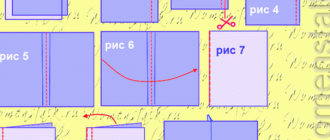
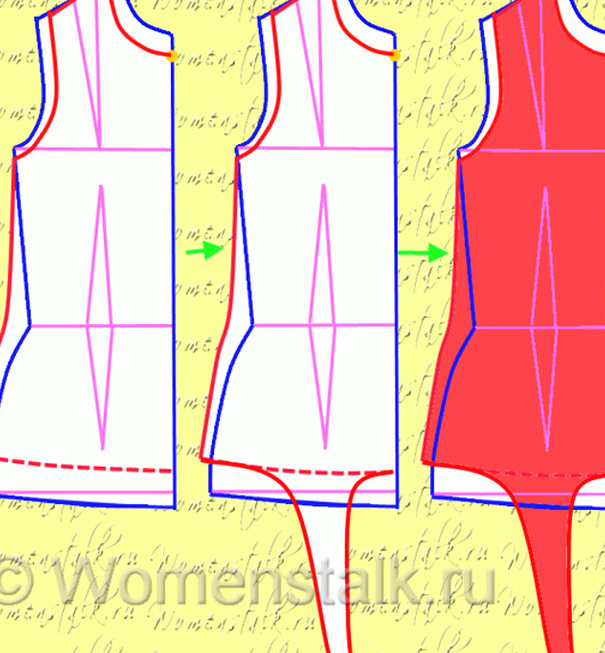
This topic (like all other topics in the world) is created on the basis of your BASIC non-patchwork pattern – and top pattern we we get a little “finish” this basic pattern base. Here how will it look like:
We take a pattern – we remove a copy from it. And on this copy we spend the following manipulations – we change the neckline and the armhole line.
To draw all the lines correctly, we must analyze the photo of the top.
Judging by the photo, the line of our neckline in blue the top passes somewhere 2-3 cm below the base of the neck – which means pattern-based lower our neckline at the same distance (yellow dot). And from the sides the neck does not reach the base of the neck on 1 cm. Therefore, on the base pattern, we retreat 1 cm along the shoulder line to the side of the neck edge (pink dot). If your face oval a neckline of a different shape is more suitable, you can draw neckline of a different depth and width.
Now armholes for hands – judging by the photo in blue the armhole line is almost classic – that is, a little higher in shoulder lines than on a basic pattern-based. You can optionally also slightly lower the lower edge of the armhole (axillary point) – Well, so that she is away from the armpit. But not so low that your bra peeked out – it’s not aesthetically after all.
Now smooth out the fit of the side lines (so that the topic does not fit us at the waist, but is slightly free). Even if you look closely at the photo, it becomes clear that the detail of the front end is specially expanded down to when the knot is tied up, it turns out a sort of assembly of folds going with all sides to the site of the node. So on our pattern, we are expanding side lines.
And now we determine where we will have a bundle (by center or a little on the side) – mark this place with a dot – and start draw down our bracelets (the very long braces that we and tie in a knot). How to decide how long should the straps be? I I’ll tell you that approximately 4 cm of length are spent on a double knot the whip. That is, 4 cm will go into the knot, plus a few centimeters on the hanging “ears” – the ends of the straps.

The back of the topic is modeled with the same neck width and shoulder line width – as with the back part – so that they then and the back coincided with each other when stitching.
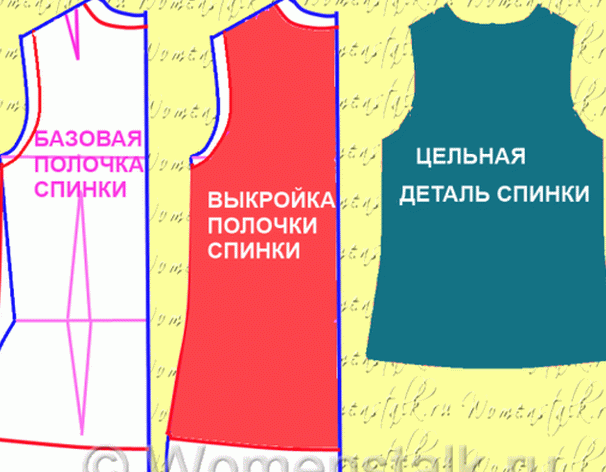
Here – now we can say that our pattern is ready.
We sew a top with a knot tied below.
1) Cut out our pattern, put we put it on the fabric – we circle it with chalk (not forgetting to LEAVE ALLOWANCES ON SHOULDER AND SIDE SEAMS). How to tailor a stretch or slippery fabric I talked about in this series of articles.
2) We sew the back part with the front part in lateral and shoulder seams.
3) We process the bottom of the product: either overlock, or bend and stitch the edge – processing goes along the entire lower edge and along the edges of both hips.
4) We process the neck and armholes (how to do it on a stretch, I told here)
TOPIK WITH TIES ON THE BREAST.
We also model this topic based on our BASIC PATTERNS.
We take a copy of our basic pattern, namely that BASIC PATTERNS where the thoracic tuck was removed. You remember that the basic pattern in its initial stage is drawn in three versions (for a tight-fitting silhouette, for a semi-fitted silhouette, for free silhouette). If we sew stretch fabric – we Need a pattern of an adjacent silhouette. Plus to that of her you need to remove the chest tuck (that is, turn the usual base a pattern of an adherent silhouette – into a BASIC PATTERN FOR TRACERS FABRIC.
So, we take this basic pattern for the stretch, and we will now turn it into a pattern of our topic on ties.
WE MODEL THE TOP CUTTING ON TAPES.
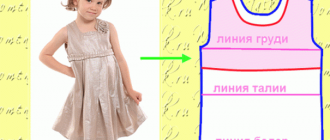
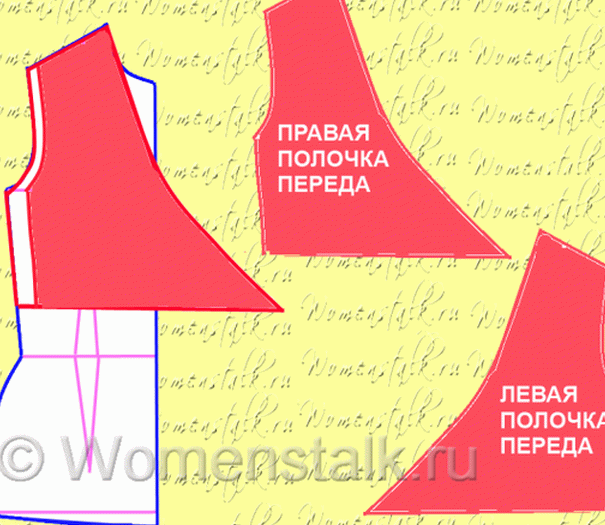
For proper modeling, you need to carefully look at photo of this topic:

we see that the neck of the topic begins at the side base of the neck – that is, it has the same width as neck on a pattern basis, which means the base edge of the neck patterns coincide with the same edge as our top (yellow point). We see in the photo that the neckline is very narrow – that means, on a pattern basis, it is necessary to draw sharply narrowing neckline.
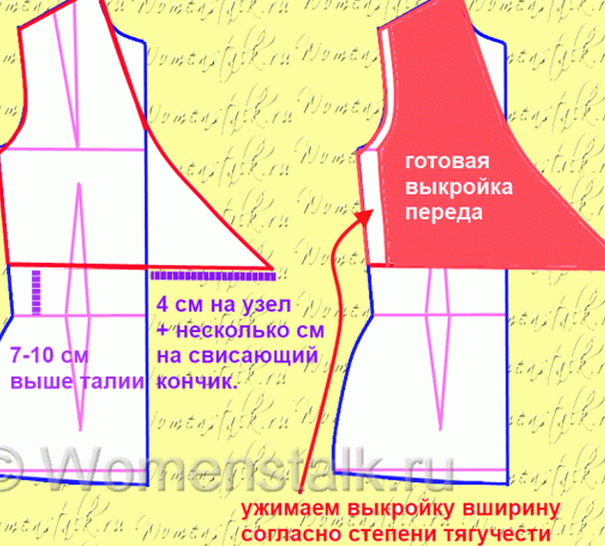
Now you need to decide where you want the bottom edge to go topic (judging by the photograph – the bottom edge of the topic runs on 7-10 cm higher than the waist line). We measure on our pattern the desired distance from the waistline – mark with a point and draw horizontal line.
Now we need to draw the bracelet itself, which will be tie up. The length of the strap should be enough for the knot itself and for sticking tails.
How to calculate the length of the tie strap:
To find out how many centimeters to draw a strap, you can conduct a small experiment – take a strip of the same or another (similar to this in thickness) fabric, tie it into a knot, stepping back from the edge of the nodule to the distance we need, make the marks shallow. Then untie the knot – and measure the distance between the marks. it and there will be a length of a nodule with two straps. Since on the pattern we draw one braid – then we divide this value into two.
Or you can not check, but trust Olga Klishevskaya on word. I’ll tell you that for ordinary fabric the stretch is a double knot steals from a braid about 4 cm long. So the strap should be done with a calculation of 4 cm per node, plus a few centimeters on the hanging tips.
By calculating, thus, the length of the strap, you can start it paint. We draw like this, as in the picture – a tie strap looks like a long triangular extension to the side, our shelves.
So the pattern is ready.
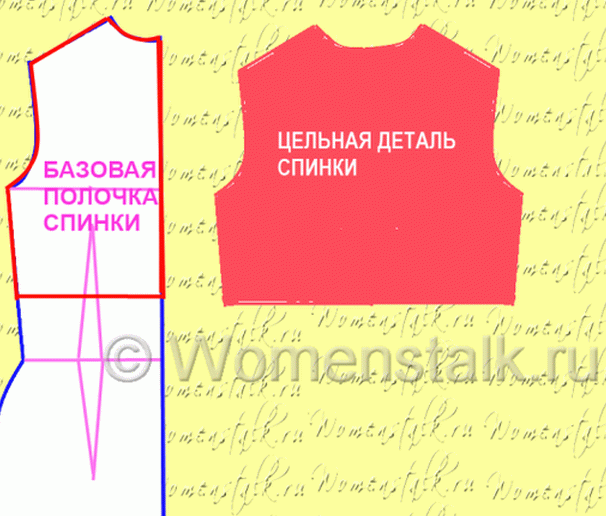
The back pattern is drawn even easier – the arm and shoulder lines and match those that are drawn on the base pattern-base. The neckline is the same depth as on the base pattern. A line the lower edge of the topic from the back (as with the front part) passes to 7-10 cm higher than the waistline.
We do a pattern of a classic sleeve according to my lesson “Sleeve for clothes – do it yourself. Part 1 “. And since we need a sleeve in slipping – squeeze it a little wide.
Sew a topik with ties on the chest
1.) When all three patterns are ready (front, back and sleeves), we put them on the fabric, circle (for stretching, do not leave allowances at the seams), and cut it out. We get one back, two shelves and two sleeves.
2.) Now we sew in front and two shelves of the back in the SHOULDER SEAMS (we do not do side seams yet, so it will be more convenient for us to sew sleeve).
3.) Sew the sleeve to the armhole (more about this in the same article about the sleeve).
4.) Sew the side seams of the topic and the side seam of the sleeve (vertical seam that goes along the arm)
5.) We process the bottom of the topic and the edges of the shelves, smoothly turning into neck (bend the edge and attach or overlock), We also process the lower edges of the sleeve.
That’s all, our topic with ties on the chest is sewn. What are you and Congratulations. In the following article we will sew topics with assemblies on shoulder.
Good luck with your tailoring.
Olga Klishevskaya, specially for the site “Women’s Talk”.
/p