Good afternoon, my dear beginner seamstresses. Today I will continue a story about how to work with silk. In the first part of our article, I told how to prepare the fabric for cutting, how to wash and iron silk. And today we will focus on the fact that most scary in working with silk – open up. And also I will tell you what threads and needles are suitable for silk, which stitch it is best to scribble silk, how to grind together details made of slippery silky fabrics.
We will learn everything about silk, and then I will create master classes of various silk topics, tunics and dresses – and you you will already know all the tricks of working with silk, and not be afraid to sew them this expensive and delicate fabric.
So…
Contents
How to cut (so that the fabric does not slid)
Difficulties in cutting silk fabric caused by its silkiness – that is, the fabric can egozit, slide on the table and therefore crooked the pattern will be transferred, crookedly cut.
But this does not threaten us. Because we will abide following rules:
- Silk fabric for cutting must not live on naked smooth table, and cover the surface, for example, with a woolen blanket or other rough even fabric (even the sheet is suitable if it is not made of silk). There will be no silk on wool slide – besides, he also sticks to it static electricity. Spread the silk on this blanket – check that it lies evenly – nowhere bubbled, did not warp.
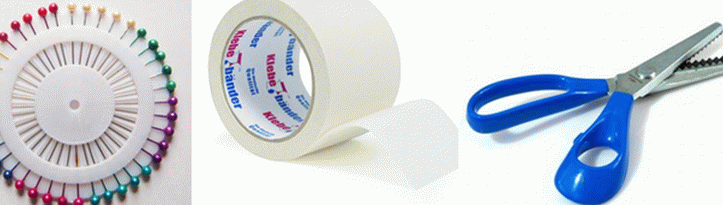
- The pattern for cutting needs to be done already with allowances for seams. Why? Because we will pin it to silk pins around the edges – precisely in the area of allowances. Only there you can pin – for on silk a pin mark remains.
- Or you can not pin a paper pattern with pins, but stick with masking tape (this is the one that the windows are pasted over). Check on the edge of the fabric like yours silk responds to the touch of masking tape. It is very convenient way – on the back of the pattern we attach in places this masking tape (it can be attached to the pattern with stripes of ordinary stationery tape). We put such a sticky pattern on silk – and calmly cut – the pattern will not budge.
- There is another option – translate paper pattern on cotton fabric. And already cut cotton part pins put on a silk cloth and cut.
If a silk item is planned to be planted on doublerin or non-woven (i.e. glue) do this before cutting. That is, cut from the doubler detail. Put it on silk, (where it should lie on I will open it) to cover, than it should be, and iron-glue with an iron. AND only then cut with scissors. By the way, for silk fabrics It is recommended to use the finest transparent non-woven – it doesn’t droplets do not appear on the front surface of the part.
For transparent fabrics, adhesive it is better not to use gaskets, they shine through fabric, and the adhesive can (about horror) appear on the front side of delicate silk. Therefore, for transparent silk as reinforcing pads (if needed) use organza (her cut out in the same deposition of the lobar as the silk part)
Natural silk is very frizzy in cuts. Therefore, it is better to cut the slices immediately after cutting, in any way simpler. It also helps against excessive flowability of the cut – cut special scissors with zigzag blades.
Preparation for sewing (selection of thread, needles, adjustment seam)
The choice of needles. Silk is very injured by a needle (there is a trace of a puncture) so for manual sweeping it is necessary take bead needles. They have a tiny ear and themselves they are tiny – traces from such an estimated seam will not be so visible.
And you need to put thinner needles in the machine – No. 60-70. And make sure the needle is smooth, without roughness – better buy new ones.
Also try not to redo the seams when sewing – therefore that after opening the seam, a very visible mark remains. Before, how to scribble, try on your future product and make sure that it tailored correctly and you don’t have to redo the seams later.
The choice of threads. Best of all – silk threads (No. 65). But if you can’t find it in tone, then cotton or linen ones will do. Polyester can (if there’s absolutely nothing), but check how the line goes down – it happens that the thread is made of polyester, when it comes out the stretch from the machine stretches, and then at the seam “relaxes” shrinks back and tightens the seam.
And cotton threads are still good because if your dress snag for anything, it’s more likely that the seam with the hebesh thread will burst than tear tissue. And if there are seams of polyester threads – then the seam itself can withstand, will not burst, but the silk fabric along the seam sprawls. Better let the threads burst.
Sewing machine preparation.
Some seamstresses when installing silk foot with a small hole. Or special needle plate with a small hole for the needle (by the way, it is possible to seal an ordinary plate with tape). These fixtures prevent the possibility of prying up delicate silk canvas – when moving the needle up and down.
But these devices are not required. Not every silk is viscous and lightweight to support up behind the needle. But if this is observed, then enough put a strip of paper between the silk and the needle (tracing paper, newspaper, toilet paper).
Lower silk can also injure delicate silk. conveyor (iron engine with teeth, which scrolls the fabric forward). If this happens, lay between conveyor and silk sheet of tracing paper (toilet paper, newspaper).
Set the stitch length to a distance of 1.5 – 2 mm This is the best step for silk fabric so that the seam has less opportunities to creep. Experiment on scraps of silk fabrics to debug a line.
Stitching details – the nuances of sliding and make-ups
Practice grinding down details:
Most sewing machines when sewing two parts attach the lower fabric. Most often it is occurs on slippery tissues. That is, the lower protractor pushes the lower layer of fabric forward, and the upper layer of fabric slows down a bit (because the fabric is slippery and grip between the two layers of fabric is weak – here the lower fabric passes a little faster than the top).
Perform an experiment on the flaps. Stitch 2 identical the length of the patch. If the lower patch in the seam area is shortened, and on the second is superfluous – that means this fabric with this machine gives fit. But it’s not at all scary, usually a fit quite insignificant. And it can be solved in several ways.
The first way. The simplest and most reliable is before stitching two parts on machines, they must first be manually sew together. Then both layers will be already one and will pass on the conveyor at the same time.
The second way. Also very reliable – future seams on parts need to be glued with narrow strips of the finest adhesive non-woven. And stick a strip of non-woven fabric like this so that it only protrudes 2 mm beyond the intended seam line – and most of it lay on a bum for a seam. It is necessary that she didn’t look out of the seam then
The third way. Install on cars upper protractor – it will be, in parallel with the lower conveyor, scroll through the top layer of fabric. Top conveyor either built-in or removable, sold separately.
The fourth way. And let him sit down – it’s not scary – that is, you want to quickly, and you are not very fundamentally this fit of the lower layer of tissue. Then at least follow this rule:
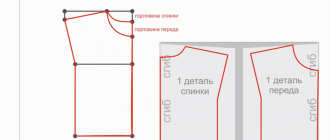
- When sewing paired parts (shelf + back, back leg + front) it is necessary to observe the symmetry of the fit.
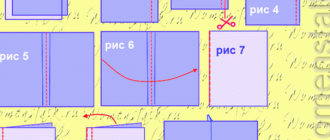
I show on an example of sewing 2 shelves to the back. We put a shelf and a back to each other with their sides inward and stack under the machine so that the shelf is from above. That is, we grind (sew) parts from the side shelves, then fit (squeeze slightly) back detail. AND when we sew the second shelf – we also put two under the machine details, so that the top of them is a shelf – then on the other side fit will also happen on the back.
- And the second nuance is the side seams (right and left) should go in one direction – from the armpit to the bottom. Then at the bottom (at the end of the seams) on the shelves there will be an extra centimeter of edge (because along the back line the seam has grown, shortened, and shelves remained as it was). This extra piece is at the bottom of the detail. shelves can be simply trimmed.
- Observing these rules (for the fourth method) we get quality product, where the tightening will be symmetrical with both sides, and the tie will be located back (on the back) – which corresponds to the technology.

Well – now you already know about working with silk as much how many professional tailors.
But that is not all. In the third (last) parts of the article I will tell you what seams are used when sewing from silk. What seams are used to process loose sections (if there is no overlock).
As well as how to look after the silk item and wash stains from this delicate fabric.
And after that we will begin to sew wonderful models of dresses and tunic and silk (such as in the photo above).
Olga Klishevskaya specifically for the site “Women’s Talk”.