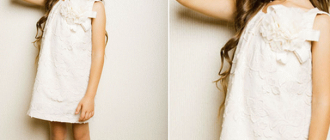
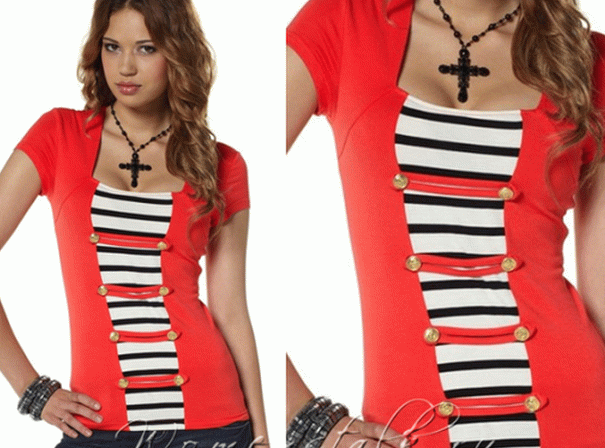
Good afternoon, we continue to sew tight-fitting T-shirts and tops from stretch. We already sewed tops of a loose silhouette, semi-adjacent silhouette and tight-fitting tops made of stretch. And today we will do it Here is a topic with colored inserts from another fabric. Pretty model, isn’t it – something reminiscent of a hussar’s uniform … these shiny buttons, and lacing, and color.
We make a pattern of a red topic “a la hussar tunic “.
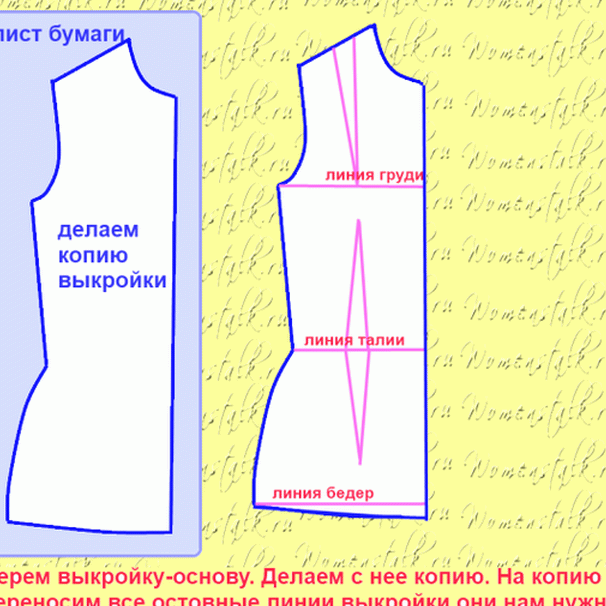
To create a pattern for this topic, we need our basic pattern-base of the adjacent silhouette (in who doesn’t have a base pattern, go to my article “Building Patterns –Foundations – the most understandable way for beginners “- we read the article and very quickly without “hemorrhoids” and “confusion in the head” we draw this very pattern in 30 minutes.
And also from this basic pattern we will need to remove the chest tuck (because we sew from the stretch and tuck on is not needed). how from the usual base pattern to make a non-recessed BASIS Pattern, I showed in detail in the third article of our cycle.
Contents
Analysis of the cut of the topic.
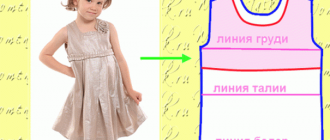
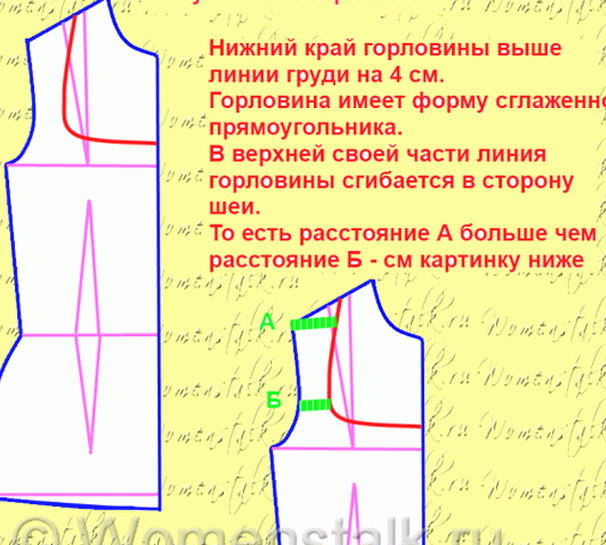
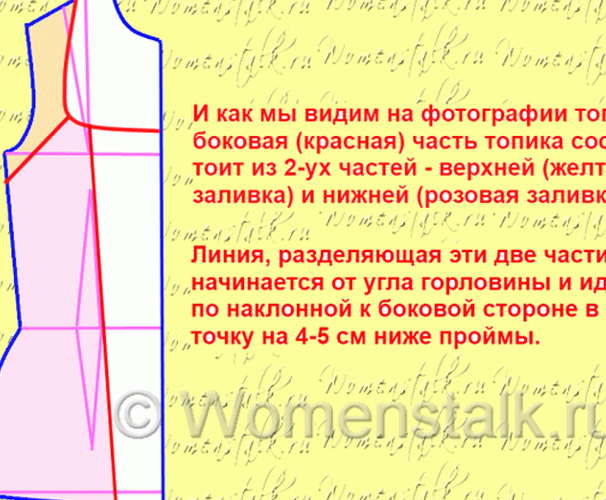
And now, let’s analyze our topic in the photo. What we have you noticed? We saw that the neck is square, that the lateral edges of the neck lie in (i.e., coincide with the edges of the neck on the pattern-base), and the lower edge necks 5-6 cm above the line of the chest.
Now let’s pay attention to the central striped insert. we see that in the upper part it is slightly wider than on the waist and hips (and it’s unlikely that she was pulled over her chest – not so she is taut). We noticed that the width of the top the striped insert is equal to the measure of the center of the chest (this is the measure which measures the distance between the vertices of the right and left chest) – on our base pattern is the distance between the vertices thoracic tucks.
And, of course, we noticed that the side parts of the front – consist of two parts – the upper (near the armhole) and the lower (from armpits down). And the border between these parts goes from the corner square neck, to a point on the side of the seam 4-5 cm below the armpit.
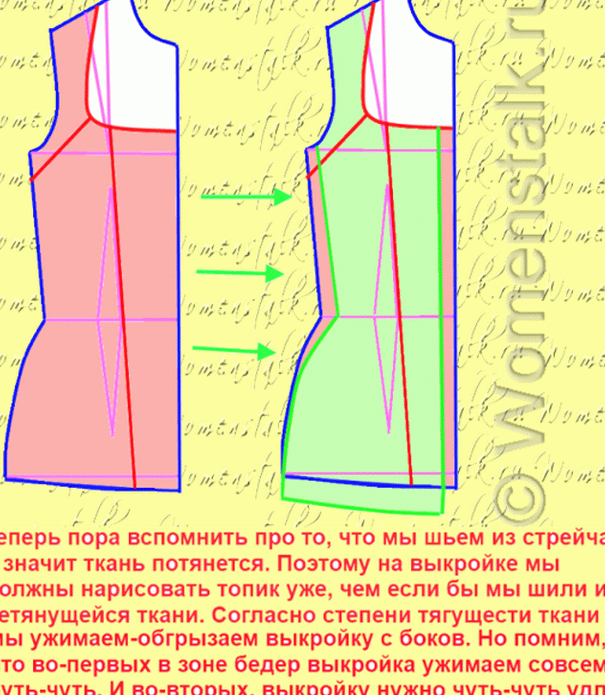
We reflect all these observations on a pattern-basis. Take non-tuck pattern base and remove a copy from it
Draw a neck (see above we did a neck analysis)
Now we draw a line finishing the striped insert on top. 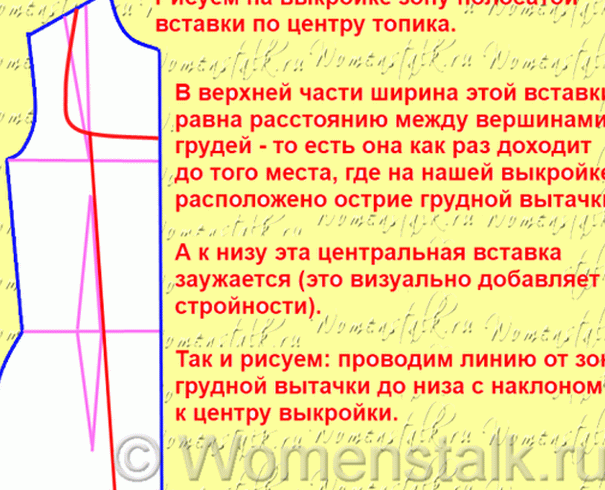
And we get a pattern of our top.
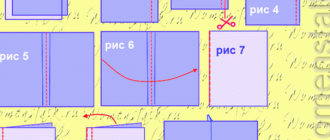
Now we need to think about the fact that if we have stretch fabric stretches – it would be necessary to take into account the ductility coefficient of the fabric and therefore slightly reduce our pattern (based on the fact that the product will stretch in breadth when we put it on). We won’t be here bother and calculate the coefficient of ductility of the fabric. we let’s do it easier – we reduce every detail evenly across all its lateral (vertical) edges, departing from the edge by 1-2 cm (if stretch stretches badly at 1 cm nibbled edges, if it stretches well 2 cm. This will allow the stretch fabric to stretch tightly. hugging your body.
Or you can nibble our pattern from two barrels:
And we make a pattern of a sleeve – very simple in my lesson “Sleeves for clothes. Part 1”. Everything is written there in great detail – and in general, you can choose any sleeve from the cycle – a flashlight or puff or even a wing (if a sleeve-wing is decorated with fringe and rhinestones, generally will be similar to hussar epaulettes).
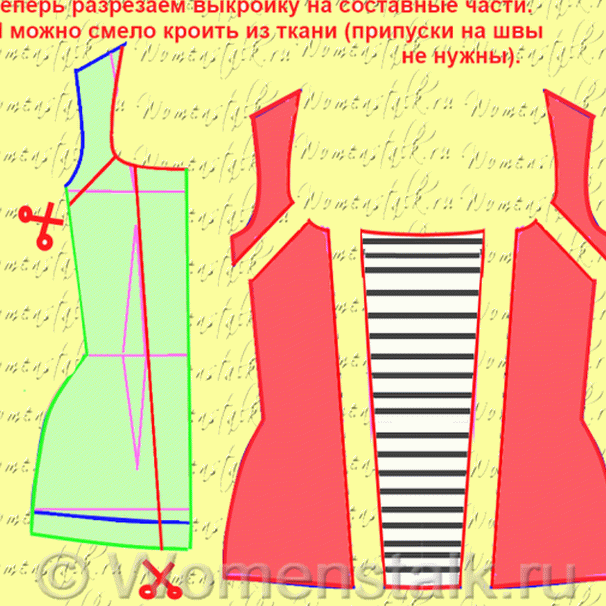
Now you can cut out the details and sew the top.
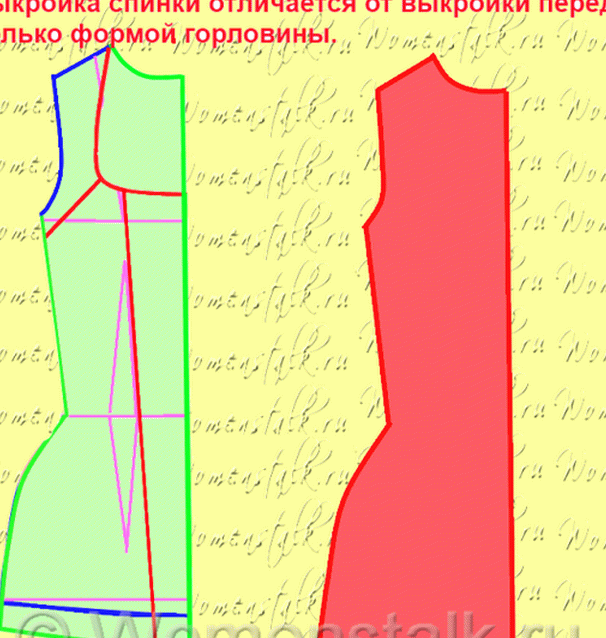
The back pattern remains classic as in base pattern (just squeeze it from two barrels). Or you can take off a copy of the pattern with only the neckline is not so deep.
We sew a “hussar” topic.
- We connect the components of the front – first we sew the side parts and central striped insert, then connect the upper details with armholes.
- Now we connect the back and front in the shoulder seams. In the side seams not yet connected – it’s more convenient to sew in a sleeve.
- We sew in the armhole the sleeve ok.
- We connect the side seams and the longitudinal (along the arm, armpit) seam sleeve.
- We process the armhole, the bottom of the product and the lower edges of the sleeve.
- We sew buttons.
- We make twine from the remains of the red fabric (you can buy ready-made shoelaces) we make a big loop out of them and either sew or just dress on the buttons.
All the nuances of sewing from stretch fabric on a typewriter (with overlock or without) I told in detail in the article “We sew from knitwear.” There it was also told about threads with needles and about seams and about the processing of sections, and what to do if the machine is weird … (common difficulties and their solutions).
In the next article, we will sew a delicate topic with an application in the form corset.
Good luck with your tailoring.
Olga Klishevskaya, specially for the site “Women’s Talk”.