During the warming period, namely in spring and summer, it increases sharply
the desire of women to surround themselves with flowers. This trend is observed
every season and in nail art. Variants of flower arrangements are very
a lot, but a special place is occupied by a magnificent orchid, which
gives the woman even more tenderness and beauty.
Content:
- What you need for a manicure
- How to draw an orchid?
- Orchid Design Ideas
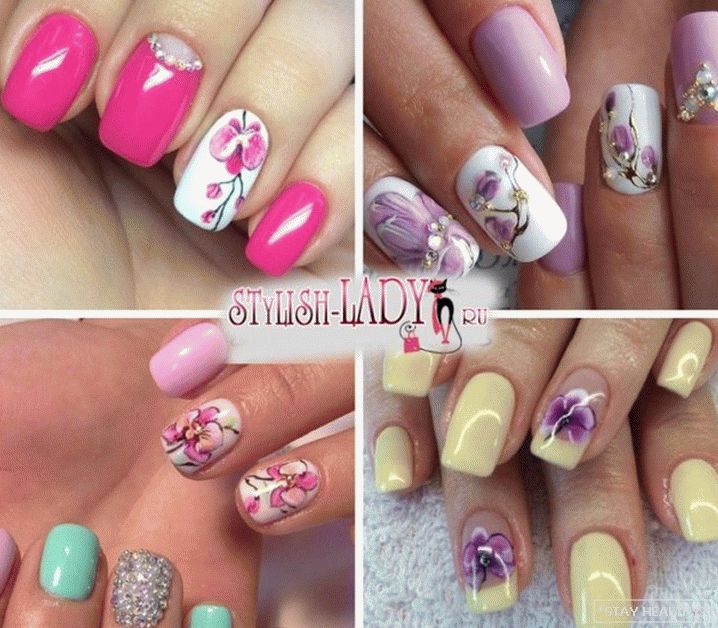
In Russia, spring is certainly associated with tulips, but in
China, the main symbol of love, harmony and spring – this is just an orchid.
Not for nothing, a manicure with orchids on the nails makes the image as a whole more
elegant and feminine, so you need to give them their due
Attention.
Contents
Required Tools
For a high quality image of an orchid will need
contact a specialized salon to an experienced master. If
there is a great desire to create a small masterpiece on the nails
independently, this can be done with the help of simple assistants
tools and lacquers available. Additionally, this will require
a little patience and enough time. Advance is necessary
prepare consumables and tools:
- any varnish or gel polish to create a basic background – the best
the option would be delicate spring shades, such as mint or
blue, lilac or light pink, lilac, etc .; - varnishes of different colors to paint the flower itself or acrylic
paint is usually purple, pink, burgundy, green, yellow,
white and black; - transparent finish to secure the finished result;
- two thin brushes – flat and round.
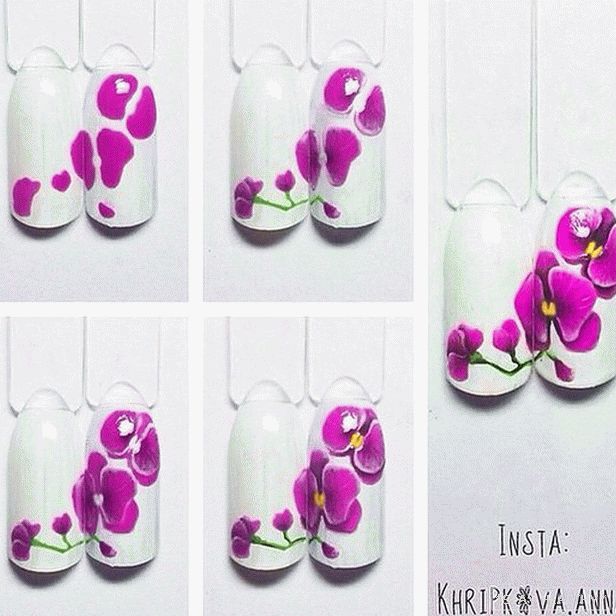
Phased instruction
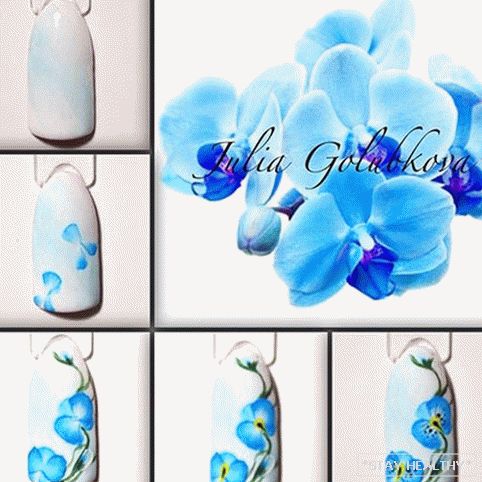
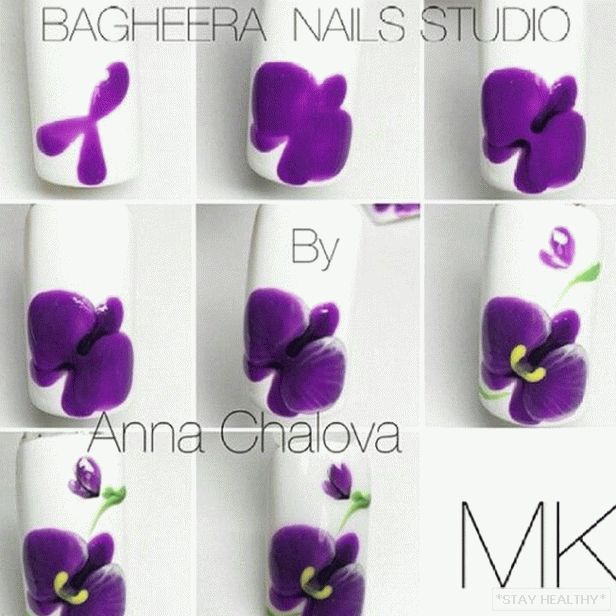
Before starting work it is recommended to carefully study the photos.
ready works, and also in advance to prepare all necessary
materials. The application technique itself is step by step.
performing the following steps:
- Preparatory procedures are underway – the necessary
the shape of the nail plate and applied base varnish. - It is recommended to apply a basic shade in 2 layers – at the same time
Nude or delicate translucent looks perfect
tones. - After complete drying of the main layer, proceed
directly to the flower itself. Place for him choose any – y
base near the tip, or in the center. The basis of the orchid are 3
the largest petals, which are drawn primarily from
middle of the flower. - Following, waiting for the drying of the petals, lighter varnish
two more are drawn, but already larger than the previous ones. White color should
draw small details and contours. - We make the heart of the orchid in the form of two points with
golden or yellow varnish. - All petals must be applied characteristic small
point dark varnish, placing them near the center. - The orchid will not be suspended in the air, so we draw thin
stems using black, green or brown lacquer. - You can show imagination and portray small buds on
neighboring nail
Having finished drawing and having carefully dried it, we cover all
flower design on top of special fix transparent
by layer.
Flower arrangement of several colors
Sometimes you want to create a whole bunch, and according to the proposed scheme
quite possible. To do this, orchids make a different size –
larger, smaller and surrounded by small buds. Wherein
it is recommended to arrange several colors on the nail diagonal
plates – in the center draw the largest orchid, and above and
below – 2 less.
To draw a plant stalk you need to take a thin brush, and
also black or green lacquer. Before this, it is better to consider it
more closely on the photo, as it is quite original form and
different from everyone else. In addition to the stem itself, you can add
leaflets with buds. For a more realistic effect, you can
use green but add a little expressiveness with
using thin dark contours. You can do the same with
flower itself, but already use white color.
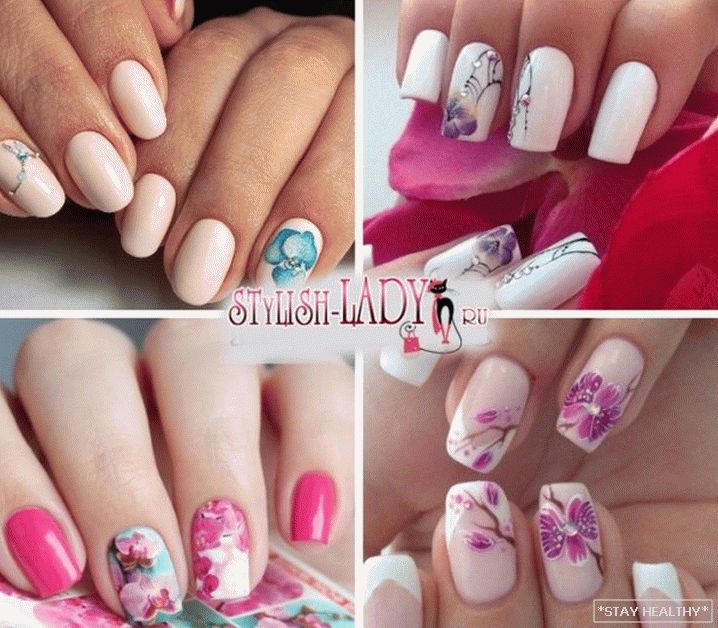
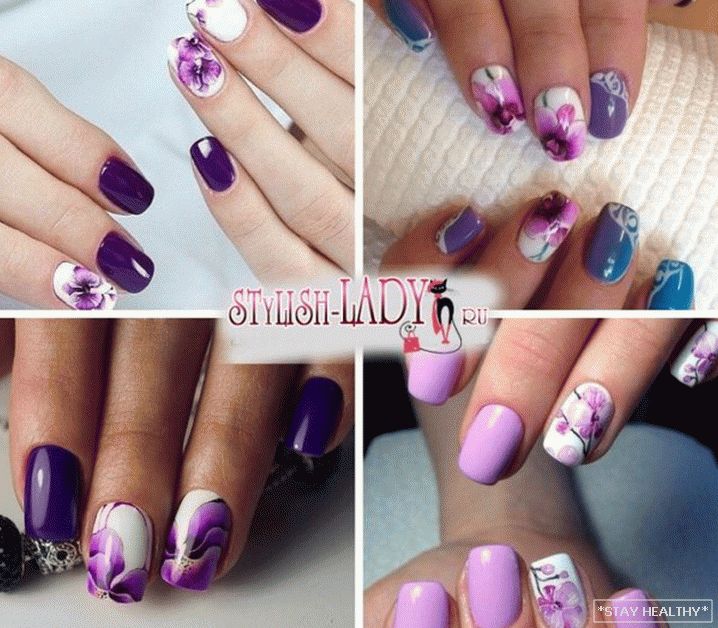
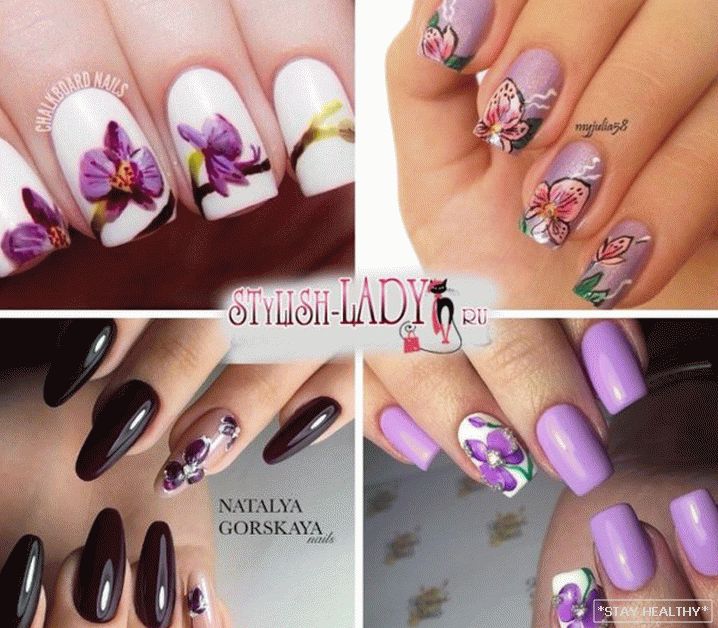
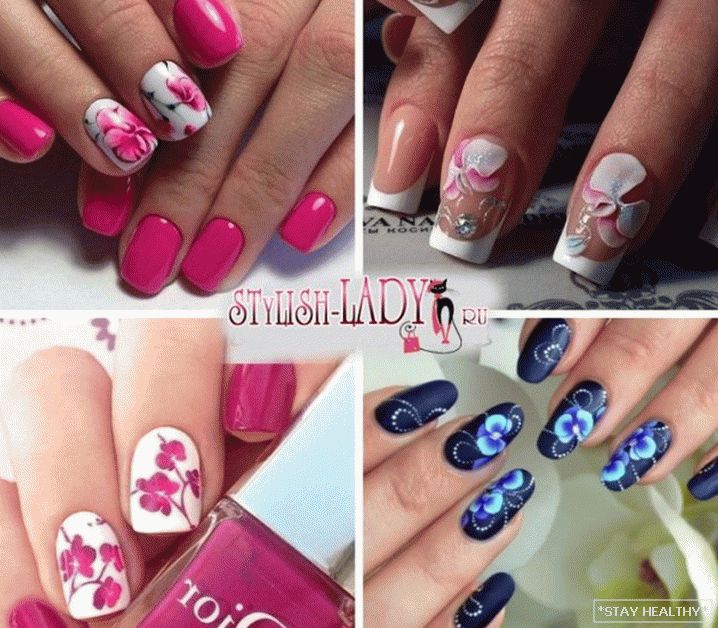
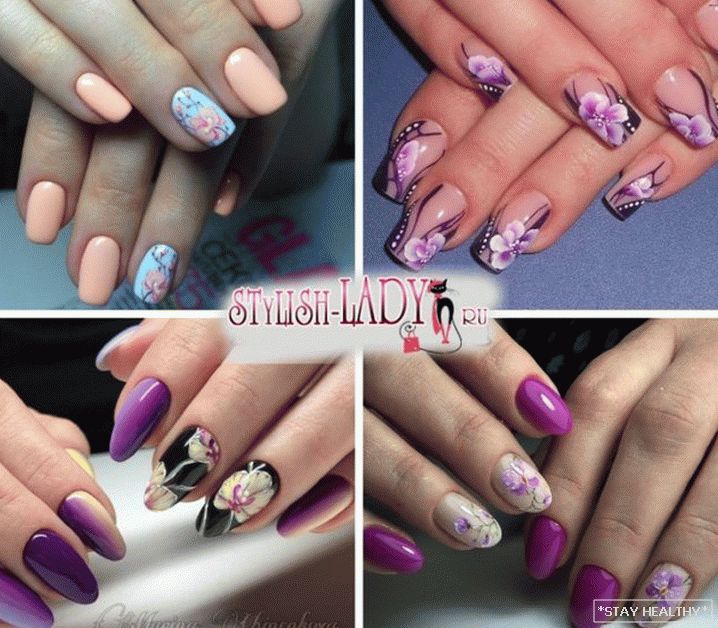
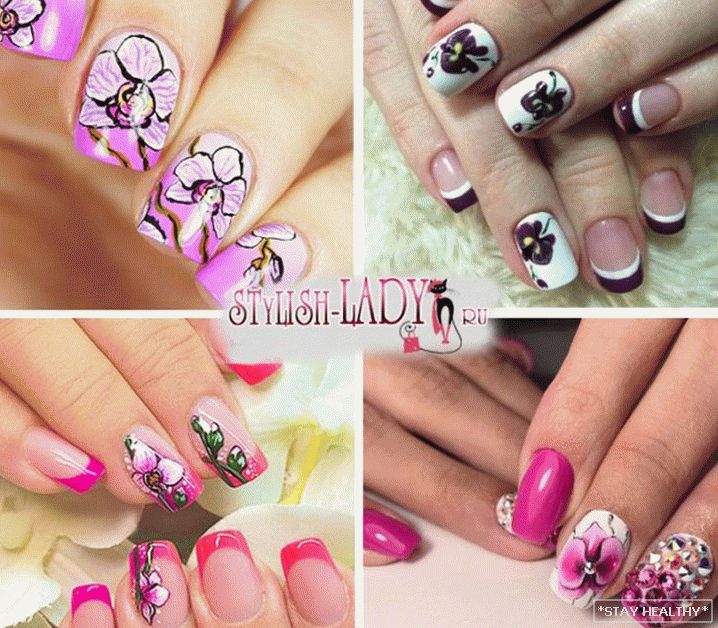
Interesting ideas with orchids
Fantasy in the theme of flower neil art is always welcome, in
first of all it concerns color diversity – it can be
very diverse. If greater realism is supposed
drawing, the craftsmen recommend using acrylic paints, so
how do they help achieve the required brightness or, on the contrary,
tenderness, by mixing several shades.
- The choice of color design may depend not only on personal
preferences, but also on the occasion. For example, the holiday option is often
make it brighter than everyday, using as a base
burgundy or black finish. As an accent can be
added golden color in the form of small or characteristic divorces
points on the petals. - Brightness and gives a white base under the flower. And the white background
can be done on one or all nails immediately. In this case,
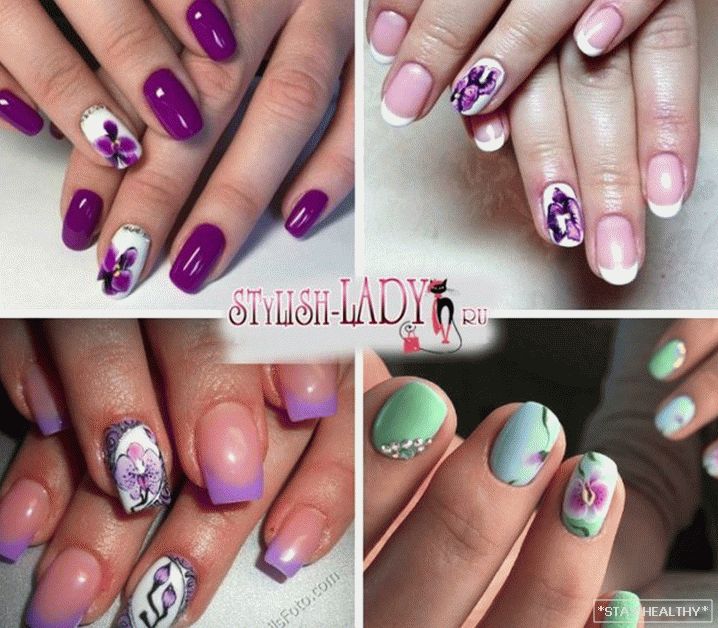
fine rhinestones are often used as decoration. - In the summer, brighter colors come to the fore –
purple, mint, yellow or blue. An excellent option would be
classic french manicure. - For decoration, you can use almost all known materials –
sand, glitter, sequins, etc. But especially elegant manicure
It will turn out on a transparent or translucent basis. For this
first the base coat is applied, and already on top it will be applied
floral pattern. - One of the aids in the absence of thrust to
drawing may be the application of modern achievements
nail production – special sliders with a pattern on a transparent
film. This method allows you to get an excellent pattern on the nails
without much effort. - For clarity, orchids are recommended to use as much as possible.
contrasting colors. If you want to get the opposite effect with
blurred transitions of shades, it is better to apply the technique
drawing which is made on a liquid varnish. In this case, you can
expect a beautiful result from mixing colors. But perfect
flower orchids can boast, if you apply an airbrush – with his
using help make wonderful smooth gradients and colors
transitions.
In the absence of special tools, you can get a good
flower with the help of an ordinary needle. For this необходимо покрыть
the surface of the nail with a thick layer of base varnish, and while it is not yet
dried – apply a drop of varnish of a different color. Patterns for orchids
formed by a thin needle. As soon as a good one is received
drawing, it is left and allowed to dry. After that top
Be sure to apply a layer of transparent fixative.