 Пн, 16 май 2016 Автор: Карина Рамазанова
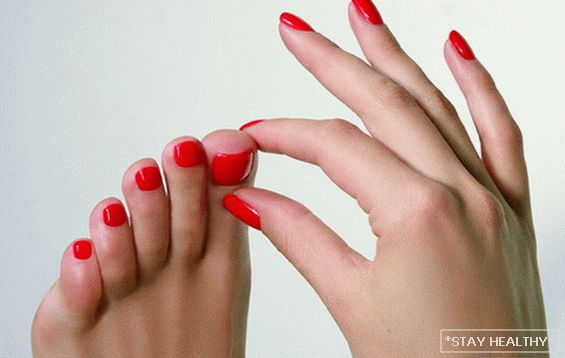
Well-groomed hands – one of the essential components of the image
girls
However, not every girl wants to spend a lot of time on
manicure.
After all, if you paint your nails with ordinary varnish, there is enough
A common problem is that the lacquer is quickly erased or chipped.
Therefore, acryl has come to replace conventional lacquer coating.
Acrylic nail extension was popular for quite a long time, but
Acrylic coating had its drawbacks – after removing the extensions
nails their nails became fragile, brittle and demanded
long recovery.
And the nail extension procedure itself is quite complicated to
deal with it yourself at home.
Therefore, the beautiful half of the planet’s population required
an innovative tool that can be applied to the nails
easy as a varnish, but so that the resistance of the coating is not inferior to the resistance
extended nails. This tool already exists and uses
wildly popular among girls. This coating is called
shellac or gel polish. Read more about what this coverage is and how
apply shellac correctly – later in the article.
Contents
Shellac is what?
Resistant as a gel and easy to apply as a varnish means – here
how to characterize shellac. This coating has been developed
in the United States. Shellac has incorporated the best properties and from
ordinary nail polish, and from the gel to build. Coating
gel polish easily keeps up to 4 nails, and in some cases even
up to 6 weeks. That is, the need to update the manicure occurs
only because of the growth of the nail, and not because
fragility of coverage. This is one of the most important, but far from
The only positive quality of this popular coating.
Consider other advantages of shellac:
1. Ease of coating. As stated earlier, shellac
applied as a normal varnish, there is nothing difficult in the procedure
drawing. No need to cut the top layer of the nail before
apply a coating, gel polish is applied to the nail plate without
special preparation. Therefore, you can apply shellac yourself,
without help, at home.
2. Coating легко снять. To remove shellac, do not need it
file and spoil the nail plate. This task will cope
special liquid for stripping shellac.
3. Gel polish allows you to grow your own nails and does not worsen
their quality. However, many girls use cheap gel polishes,
composed of aggressive components, so the quality
nails after the procedure leaves much to be desired. But if
buy high-quality gel polish and know how to apply
shellac on the nails, no problems with the state of the nail plate
will arise. In addition, shellac protects nails from exposure.
environmental and mechanical damage.
4. Shellac dries quickly when exposed to a UV lamp, unlike
acrylic. Therefore, the procedure of applying shellac takes from 40 minutes to
1 hour maximum. In comparison with the nail extension procedure, this
very quickly, because the build-up usually lasts at least about 2
hours
5. Coating шеллак не тускнеет со временем. It means that
nails will look like a manicure was done quite recently,
even when a couple of weeks pass.
6. A variety of colors. There is a huge amount for sale
gel polishes, completely different shades, including gel polishes with
sparkles. Shellac, unlike ordinary varnish, when applied is not
�”Smeared”, so create patterns on the nails using
gel polish is much easier.
7. There is no allergic reaction to shellac. therefore
it is possible to apply this covering even to pregnant women and feeding
for women.
Плюсов у покрытия шеллак много, поэтому оно и
is so popular with girls. Однако, есть и
minuses:
1. The need to purchase UV lamps (LED lamps). Worth it
the lamp is not very cheap, but without it it is impossible to apply shellac.
2. It is difficult to apply the coating on the right hand, if you make shellac
on their own. This is more of a niggle than a minus, because
applying the usual varnish each girl faces such
a problem.
3. The need to purchase special funds for removal
shellac.
The disadvantages of shellac are much less than advantages, and they are not so
are significant. therefore такую процедуру однозначно можно рекомендовать
all girls. But how to apply shellac at home
few know far. therefore о технологии нанесения данного
Coverage will be on.
How to apply shellac: sequence of actions
To gel varnish held on the nails as long as possible, it is important
know how to properly coat shellac. When
non-adherence to action
exfoliate. Detachment may occur due to poor quality
gel polish, so it’s best not to try to save, but to get
high-quality gel polish.
In order to make a manicure using shellac coating,
need to purchase the following things:
1. File, manicure brush and other manicure
instruments
2. Antibacterial agent
3. Degreaser for nails (bonder-gel)
4. Base gel varnish
5. Color gel polish
6. Anchoring (finishing) gel polish
7. UV lamp (LED lamp)
8. Liquid to remove the sticky layer (klinsser)
9. Cuticle oil
10. Cotton pads
Of course, to get home all these things, you need to have
impressive amount of money. But the amount spent will pay off in several
months, since the services of a manicure master are not cheap. If not
desire to acquire such a large set, it is better to turn to
proven master who uses only quality
materials. However, if the decision was made to learn
do yourself a manicure with a coating, then you definitely need to
learn how to apply shellac on nails.
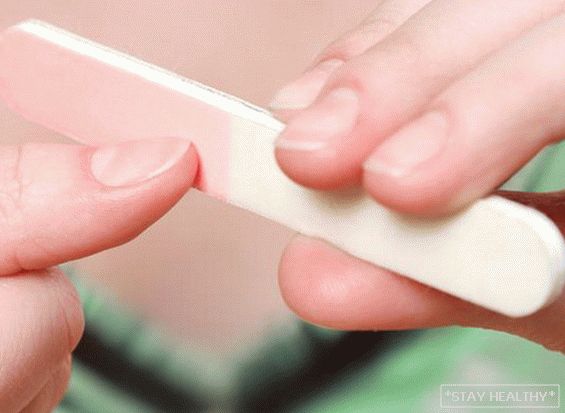
1. Before applying the coating, nails must be prepared. For
This is enough to make a regular trimmed manicure or give
the desired shape of the nail file. Be sure to push back and
cut the cuticle to manicure looked as neat as possible.
After that, the surface of the nail is better to grind special
using a nail file, and after, a manicure brush to remove dust
after filing and grinding.
2. Next, you need to disinfect the surface of the nail with
using an antibacterial agent. This will increase
the adhesion of gel polish to the nail plate, which means that the coating
will hold on for a long time.
3. But disinfection alone is not enough to keep shellac on
The nail is very durable. therefore очень важным шагом является
degreasing. To degrease the surface and remove moisture,
It is necessary to apply a special bonder-gel in an even thin layer on
all nails. If the surface of the nail remains moisture, grease, traces
cream or butter, the shellac can simply peel off and all the labors
will be in vain.
4. If artificial nails in the past did not hold well and
following all points, the next step is to apply
primer. It will help avoid detachment. Apply primer is necessary
a thin layer on the nails and dry without a LED lamp for two
minutes
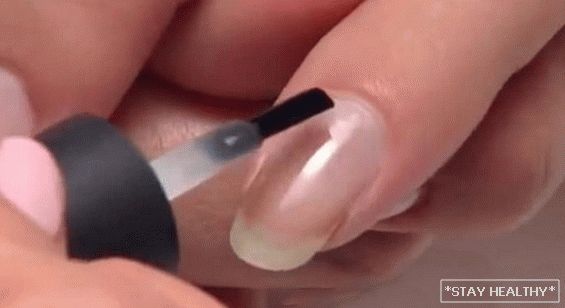
5. The preparatory stages behind, you can now proceed to
the coating itself. Correctly apply shellac in 3 layers.
The first layer is the base gel. This gel is transparent in color, without
harsh chemical smell. After applying the base gel, nails
must be dried in a LED lamp for one minute. Sticky
the layer that will be on top of the cover does not need to be removed, otherwise
shellac coating will hold on the nails for a short time and
quickly peel off. Sticky слой позволяет между базовым и цветным
gel allows you to increase the durability and strength of the coating.
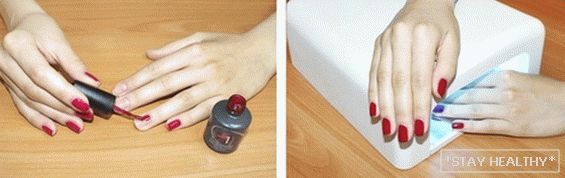
6. Next you need to apply color gel polish in a single layer. Not
It is necessary to spread a large amount of gel polish, like a gel for
building up. A thin layer would be enough. the main thing
paint over the entire nail, especially to pay attention to the edge of the nail.
After applying the nails must be dried in a UV lamp for
двух minutes And, similar to the previous stage, the sticky layer does not remove
need to. This procedure will be performed at the very end of the creation.
manicure
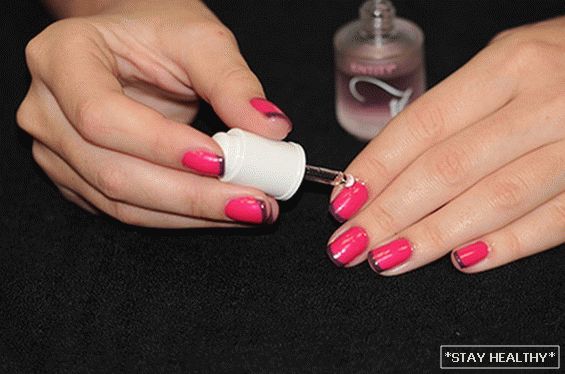
7. To align the color, make it richer and color
�“Shortcomings” of the first color layer, it is necessary to apply the second layer
colored gel polish. Next, you need to dry the nails in the UV lamp 2
minutes

8. The next stage – the application of the final coating. After him
apply nothing anymore. The color layer is covered by the finish
(top) gel varnish. It should be applied as carefully as possible to
there were no divorces. The thickness of the top cover should be slightly
more than a color layer. The fixing gel polish should lie flat,
Especially you need to pay attention to the edges of the nail. After application,
ногти необходимо просушить в LED-лампе в течение двух minutes
9. Only now can and even need to remove the sticky layer from
nail surface. Make it better with a special
funds – klinser, but some at home use
alcohol.
10. Then you need to moisten the cuticle with a special
oils. It is better not to skip this step, since the cuticle was exposed
exposure to ultraviolet rays during the procedure and moisturizing for
it is now necessary. In this process of applying shellac
finally completed.
How to apply shellac is quite easy to understand, because
the process of applying this coating is very similar to the usual
nail polish, except when drying the nails
UV lamp. But there are some tricks and subtleties in this matter,
that professionals know better than self-taught girls.
How to apply shellac correctly: professional advice
The first and important rule – no flaking nails! Before
applying shellac, be sure to cut down the detachment, as under
coated nail detachment will not go anywhere and certainly not
�”Heal.” Exfoliating nail will not be able to “grapple” with
coated, with the result that shellac will quickly peel off.
In everyday life, women often use cleaning products containing
its composition alkali. It is after using alkaline funds
shellac can not be applied. Wash your hands thoroughly beforehand.
только потом уже приступать к процедуре drawing.
Degreasing is extremely important, without this stage a manicure will be very
short-lived. therefore специальные обезжиривающие fundsа
must be used!
As for the choice of UV lamps, lamps are usually used.
power 36 watts. They are easy to find in specialty stores.
You can purchase a UV lamp and at 9 Wat, only if you have to
увеличить время просушивания ногтей с 2 до 3 minutes