 Вт, 19 апр 2016 Автор: TOсения Рахимова
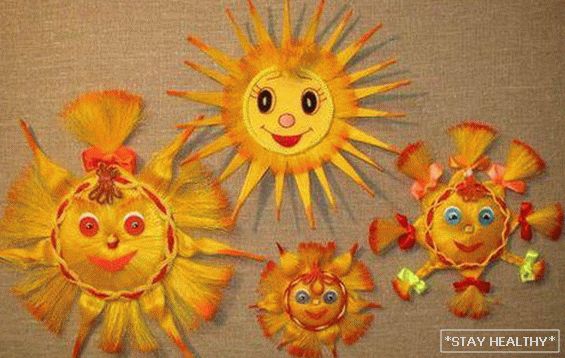
The sun brings to the house an atmosphere of warmth and joy.
Особенно, сделанное своими by hands.
This is the best guest for the children’s room. And if you make it with
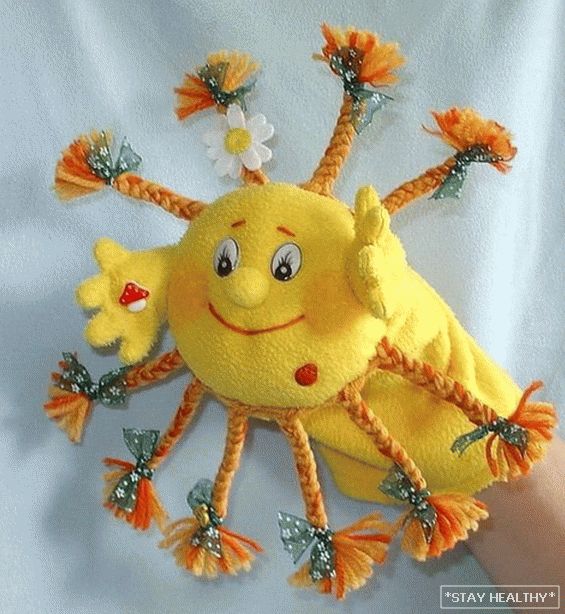
Dual function: decoration and toy ?!
This sun will be ready to please the baby every minute. Him
can even be used as a small pillow.
Textile sun is easy to use and easy to use.
wash in the washing machine.
Рекомендуется шить солнышко своими by hands вместе с ребенком. it
very useful occupation. It learns methodic in running
action, disciplines and teaches concentration. Creative
the sewing process develops fine motor skills, perseverance. For such
an adult child is learning how to use
scissors and, if age allows, a needle.
Все это очень сближает и сплачивает семью. TO
In the same way, old unnecessary things disappear from the house and are born in a new
interesting form.
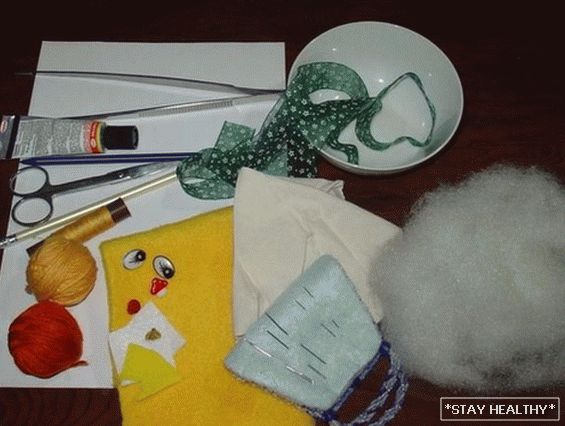
Для изготовления солнышка своими by hands понадобятся
следующие материалы: круглая емкость (например, обычная
dinner plate), simple office paper to create patterns,
fabric for the sun (you can use fleece or velor), fabric for
lining (you can use coarse calico), white and yellow felt,
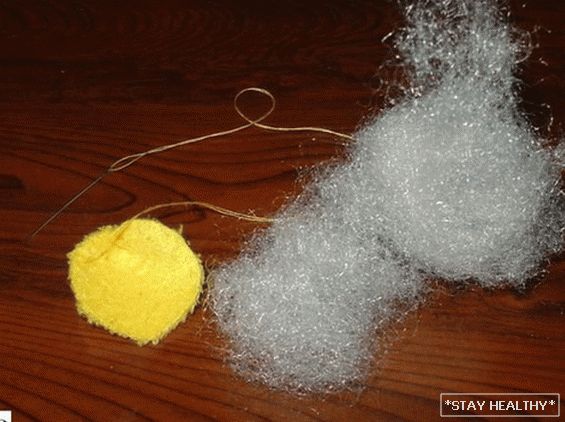
glue Moment, synthetic filler for the sun, yarn yellow
and orange for making sun rays, ribbon for
decoration, toy eyes, buttons, decorative (beetles,
vegetables, fruits), scissors, pencil, needle, thread to match, sewing
machine.
The creative sewing process begins.
sun:
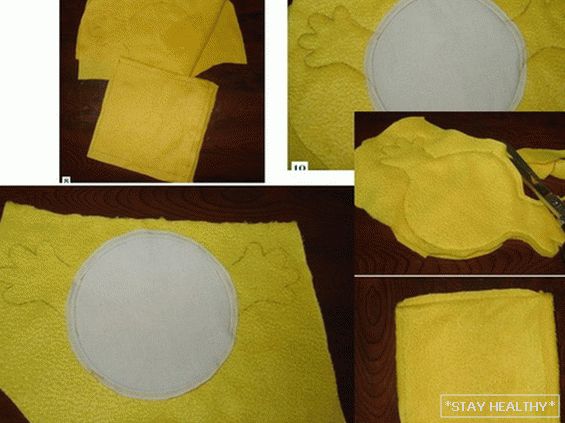
1. Take a suitable plate and overlap the paper. With
dishes of the largest diameter are selected. Looms out
a circle. TO получившемуся кругу нужно самостоятельно пририсовать одну
a hand. It is located above the imaginary middle of the sun (Fig.
2);

2. The resulting pattern is bent in half and cut into the future.
Pattern (Fig. 3);
3. In fig. 4 shows the finished pattern with two handles. Here is
why didn’t you have to draw your own second hand on
paper. Even the figure shows in what positions can be
fingers inside the future finished toy;
4. In the hands of the paper is taken and cut another pattern – back
part of the sun. In diameter it is equal to the first. In it is done
ellipsoid hole (Fig. 5). Subsequently to this detail will be
sewn fabric around the edge – sleeve;
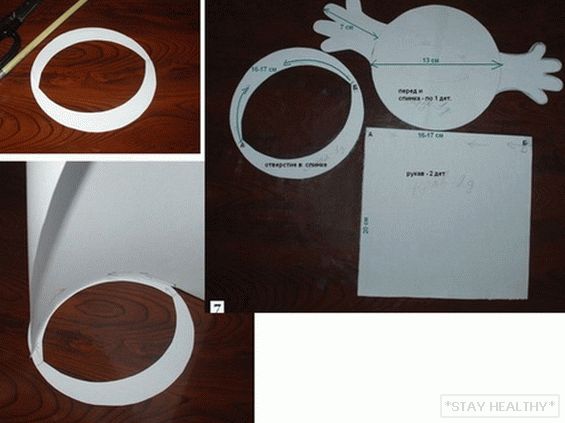
5. For the manufacture of sleeves from a suitable fabric is cut.
rectangular cut, the side length of which is equal to the length
ellipsoid hole (Fig. 6). Depth of planting fabric on hand
measured at will (from 20 cm and more);
6. Figure 7 shows all the details that should end up
turn out;
7. Patterns can be transferred to the fabric (Fig. 8). TOроить солнышко
recommended by the same pattern that was made paper
Pattern: draw a half, bend and cut one whole already.
It is recommended to fabric on the outline before cutting to stitch, as
the fabric tends to be strongly stretched;
8. Next is lining. It can be immediately stuck to
main part from seamy side. TOрай обрабатывается оверлоком
or zigzag stitch (Fig. 9);
9. Line pens are being cut. Withпуски делать нет нужды.
The opening for turning on the front side is also (fig.
ten);
10. Now you can cut the part (Fig. 11). In parallel with this
the sleeve is stripped off;
11. The pattern is taken from the back of the sun and
applied by lining. A hole is made for
stuffing toys with synthetic filler (Fig. 12);
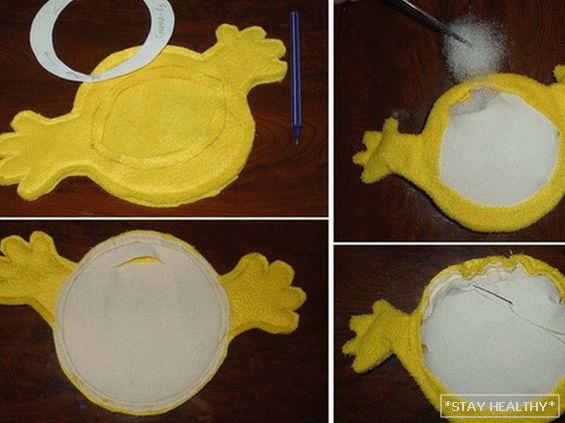
12. The filler is filled into the internal space (Fig.
13). It is recommended to use tweezers. At the end of the hole
it is sewn up manually on a secret seam;
13. A sleeve is sewn on the back of the product. TOруглый вырез
required to pull any thick thread (Fig. 14). Then
sewn from the wrong side of the sleeve. Line is desirable
pave manually;
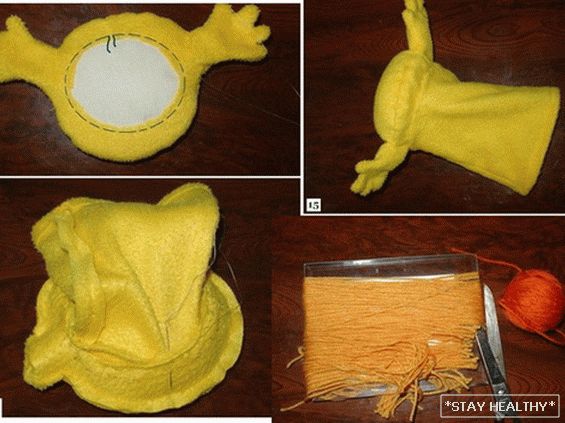
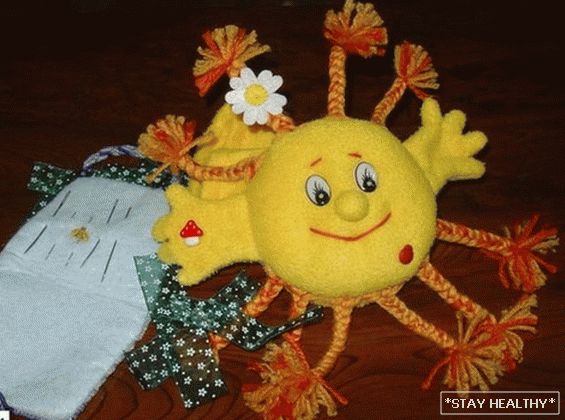
14. In fig. 15 shows the resulting product: the sun with
ручками, рукав на a hand. The main stage is over;
15. The decorating process begins. Rays are made for
солнышка своими by hands. Yarn is taken and wound on any
suitable object from 16 cm long. On the right side (or on the left)
the wound yarn is cut (fig. 16);
16. The yarn is laid out on paper (from one handle to
the arc to the other) and just the machine line runs along it (Fig.
17). The paper is peeled off;
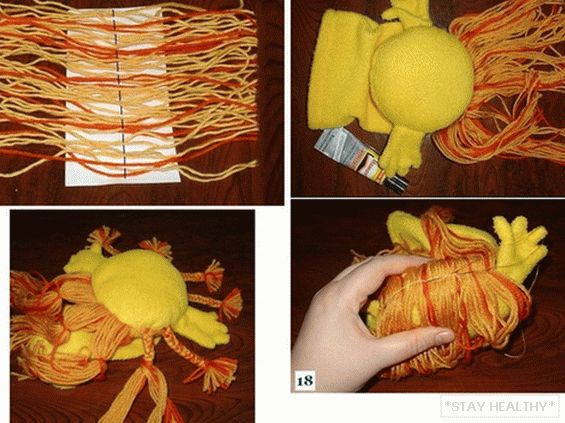
17. The resulting rays are glued to the glue moment. Later
after glue dries – sewn for reliability by hand
(Fig. 18). Similar actions should be carried out with the rays of the lower
half sun;
18. Now the rays are woven into pigtails (Fig. 19). TOосичка в
the bottom is tied with a string to prevent
blooming;
19. Decorated face. For the manufacture of the nose in the sun
cut from a fleece round piece of fabric. Around the edges it’s by hand
stitched, thread tightened to get the shape of the bag.
Inside nose stuffed synthetic filler (Fig. 20).
The resulting nose is sutured to the sun;
20. Withклеиваются игрушечные глаза. Hand-embroidered mouth shape
and eyebrows (fig. 21). Decorated on a sunny palm
(e.g. fungus). It must be tied with the facial tissue,
not from the back. The toy can be decorated with buttons in the form of God
cows. Chamomile is made of felt on one of the upper beams.
This fabric is very dense in its properties, keeps its shape well and does not
will spontaneously wrinkle. Daisy petals can be joined
each other with a seam by hand, or glue to glue. TOружок желтого
the colors are pasted last on top;
21. Tape for decoration is divided by the number of braids. TOрая
burned by the flame of a candle. All ribbons are tied to pigtails.
the sun;
22. The usual blush or red pencil draws the sun.
pink cheeks.
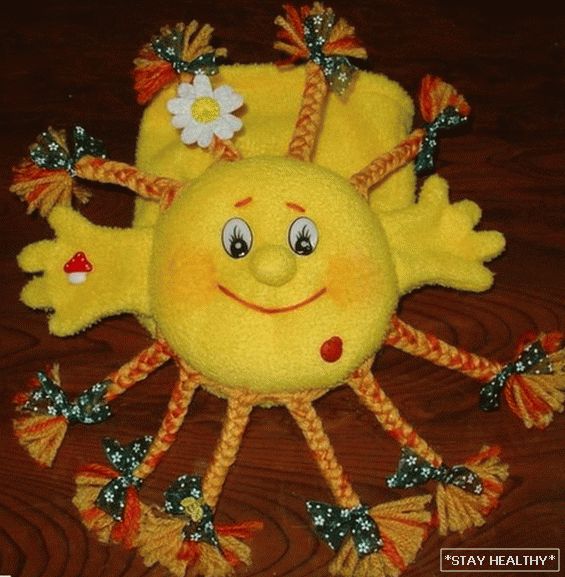
Все, чудесное волшебное солнышко своими by hands готово!