 Пн, 30 янв 2017 Автор: Марина Ивасюк
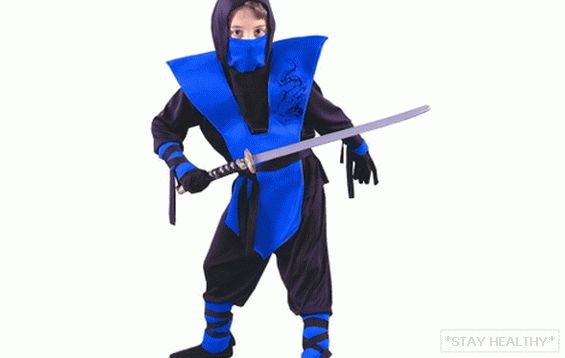
Every boy at least once in his life dreamed of feeling himself
the role of the beloved fairytale hero. Costume ball in kindergarten
or school gives the child the opportunity.
If your baby got the role of a ninja, sew it
костюм своими by hands.
Contents
Костюм ниндзя для мальчика своими by hands: материалы и
instruments
Ninja costume consists of a jacket, trousers, a cape and a belt. With
If desired, you can add to the suit Protect limbs. She performed
in the same color scheme as the cape. From this she effectively
stands out against the background of black pants and sweaters.
The main question remains from what to sew. The quality of the fabric does not have
values, but mostly monotonous on pants and sweater
cotton fabric, and thick satin on the cape.
Of the tools that will be required when working will be: sharp
scissors, measuring tape and sewing machine.
For the accuracy of the image in the sewing department, you can buy stickers
on fabric in the form of hieroglyphs or dragon. Glue such decorations
you need a cape, namely the front and back of it. On
front side of the cape stickers are arranged symmetrically on the right
and left.
Костюм ниндзя для мальчика своими by hands: кимоно
The main clothing of the ninja is the sweater and pants. Kofto can
make two options: in the form of a kimono or an ordinary jacket with
the hood.
Option 1
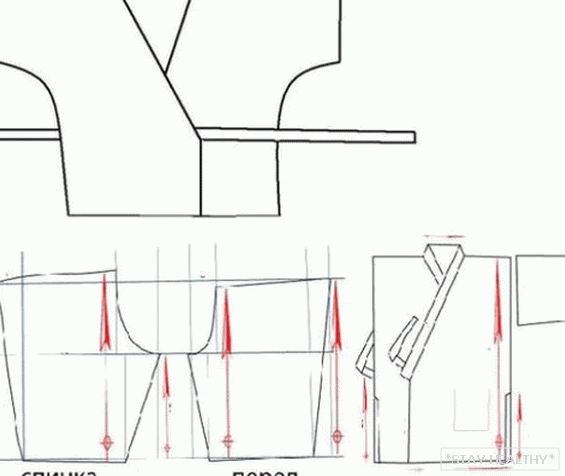
In this embodiment, the jacket will be sewn as a kimono (jacket on the smell
special cut). There are straps on the front of the jacket.
Stage 1
In order to sew a jacket, you must take measurements. Will be required
following values: jacket height (distance from the gate to the bottom
points of the jacket), chest girth, sleeve length (distance from shoulder to
hand or elbow).
Stage 2
Transfer dimensions to the fabric and you can start drawing
Details on the pattern. A simple version of the jacket for this suit.
It is considered such a pattern.
Stage 3
Cut fabric parts. You should have two front
Details and two rear and two parts sleeves.
Sew the cut elements together.
Stage 4
Tie and stitch the cut edges of the jacket, and on the top
put a 5 cm wide border around the edge. To do this, cut a strip
fabric width 12-14 cm. and fold it along in half. Withстрочите ее
to the top edge of the jacket through the neck, bending inside the edge.
Long ends should go beyond the jacket on both sides
than 50 cm from the edge.
Option 2
Кофта с длинными рукавами и the hood.
Stage 1
Take the same measurements from the child as in the first version.
Transfer them to the fabric and draw the outline of the pattern.
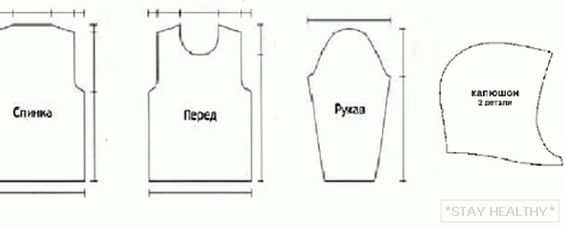
Stage 2
Cut out the parts and stitch them together. At first
The front part and the back are sewn together, and then sewn into the holes
sleeves. After sew the hood.
Stage 3
Turn the cut edges of the bottom of the jacket, sleeves and hood
and stitch, stepping back from the edge of not less than 0, 5 cm. In the hood you can
insert a thread with a length lock. To do this, cut holes in
tucked edge of the hood near the gate at the same level. Insert
thread in one hole, stretch across the tucked band and
remove from the second hole. Thread the retainer.
Костюм ниндзя для мальчика своими by hands: брюки
This suit has free cut pants, but you can
make them through the body.
Stage 1
Measure your boy. You need to take measurements: pants length
(from the belt to the lowest point of the pants), hip girth and girth
legs.
Stage 2
Transfer the results to the fabric. To do this, fold the fabric in two
layer and draw the details on the pattern.
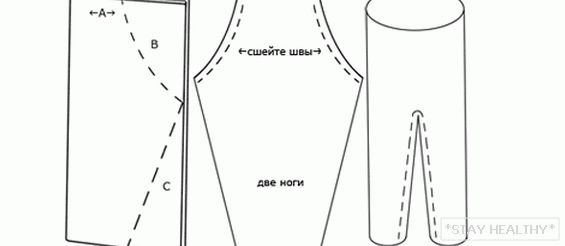
Stage 3
Sew first the top two edges together, then scroll
the fabric so that the seam is in the middle, and the sides are folded
in half. Sew the bottom two edges of the fabric of each piece separately.
with a friend.
Stage 4
On этом этапе подверните необработанные края штанов и
прострочите по всей длине, отступив от края 1 cm. Insert резинку
in the lid on the belt and leg. Pants ready.
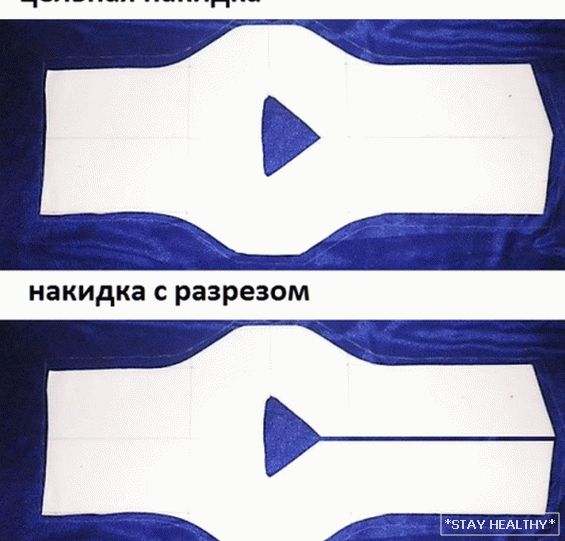
Костюм ниндзя для мальчика своими by hands: накидка
Onкидка одевается сверху на кофту с капюшонов и повязывается
belt made of fabric. She looks more like a vest.
Stage 1
To cut this part you need to know the height of the product, the width
back, plus 15 cm. on each shoulder, the circumference of the gate. Onкидка
can be either solid or with a vertical cut for simplicity
dressing up Both that and other variant is cut on practically
the same pattern.
Stage 2
Onнесите на ткань контур детали и накиньте по 1 cm. по всему
perimeter for seam. Cut that part that you got on
tissue.
Stage 3
Cut two pieces of strong but not very thick cardboard
shoulder-shaped capes. These are tough hangers that will hold
edge overhanging the shoulder. Cardboard can replace flexible plastic,
for example, from under the packaging of a toy.
Stage 4
On этом этапе вам нужно ровно вшить деталь из картона в крайний
fold seam cape. To do this, combine a piece of fabric and
a piece of cardboard so that the bend of the shoulder of the fabric matched
bending cardboard. Cardboard is applied on inner side
tissue. Заверните срезанный край ткани на картон и прошейте by hands
rough seam. Do the same with the second shoulder.
Stage 5
Process the outer edge of the cape, twisting and stitching them,
backing away from the edge of 1 cm. Leave the inner fabric at the neck.
untouched.
Stage 6
Cut the cardboard, if necessary, at the neck
so that it is 1.5 cm wide in width. Turn up the fabric
caps of a cape on a cardboard and fix it with manual draft
stitch
Stage 7
Sew the inner edge of the cape, as well as the outer
twisting and stitching along the edge, departing 1 cm from the edge. Now you have
it turned out a cape with stiff shoulders that you can tuck
without creases.
On лицевую сторону этой накидки для украшения приклеиваются
Dragon stickers and hieroglyphs, which were mentioned at the beginning of the article.
Purchased stickers are stuck under the hot iron, so if
you are afraid to spoil synthetic fabric, you can sew pictures
by hands или пристрочить на швейной машинке по контуру.
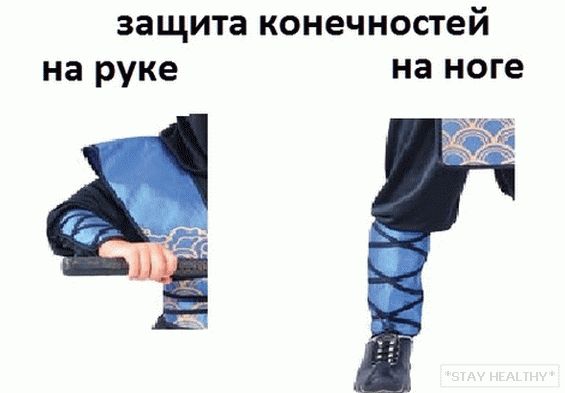
Костюм ниндзя для мальчика своими by hands: защита
extremities
Защита extremities у ниндзя была сделана из крепкого материала,
to protect in battle. For the beauty of the costume make protection
extremities того же цвета, что и накидка.
Stage 1
Cut two 20×20 cm squares from the fabric and two 15×15 squares
cm.
Stage 2
Обработайте края tissue. Better if you turn them in and out.
stitch around the perimeter of the part.
Stage 3
From a fabric of a different darker color, cut two strips.
шириной 10 cm., а длиной 1 метр. Exactly the same stripes, only
длиной по 50 cm. сделайте для рук. Handle cut edge on
they are not necessary, as they will not fluff because they will
tied to the legs and arms motionless.
Your protection for your arms and legs is ready. At first одевается сшитый на
мальчика своими by hands костюм ниндзя. Worn over the top of the jacket
cape and tied with a sash, and on the arms and legs over the clothes
protection is applied and tied with long strips of fabric
which you cut for this purpose.