 Пт, 10 июн 2016 Автор: Алина Соколова
In the shops a lot of diverse jewelry and jewelry, which means
You can always look stylish and beautiful.
But handmade jewelry has always been highly valued.
And the leader here can be safely called kanzashi of tapes, his
hands that make very simple.
Let’s try it together.
Contents
What do we need for making kanzashi from our tapes
hands?
To make Japanese kanzashi colors you need
prepare:
• directly ribbons of different colors and textures;
• tweezers;
• ruler;
• fabric pencil or piece of soap;
• scissors;
• threads in the color of ribbons;
• pins;
• fine needle;
• glue;
• lighter.
And most importantly, inspiration and some free time.
Only with their presence, your hands will create a masterpiece. Now let’s
Consider the examples of making some jewelry in detail.
After studying their technique, you can do amazing things by hand.
work.
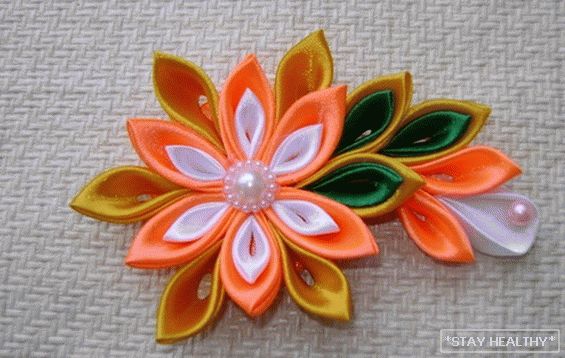
Rose-kanzashi from tapes do it yourself
To make it, you need to take ribbons of two colors – pink and
green. Moreover, pink can be replaced by any color that you
like it, we will form a blossoming bud. But from
green make leaves. Prepare scissors, thread
appropriate colors, needle, cigarette lighter and scissors.
Important! Subject to the use of tape with
2.5 cm wide, we get a flower with a diameter of about 6
cm.

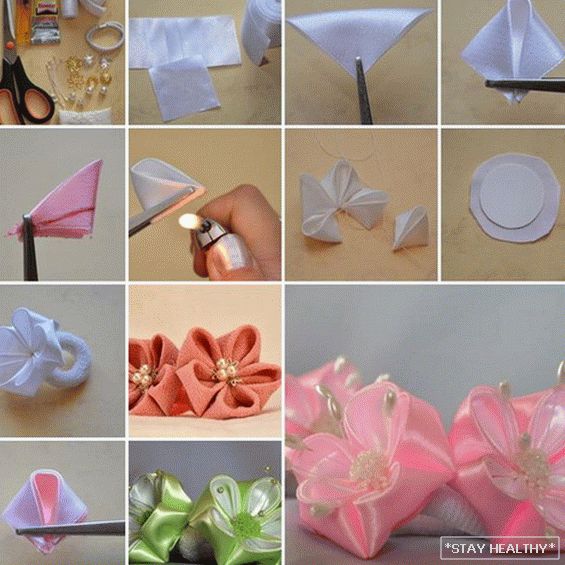
Step-by-step instruction:
1. We measure off from a tape of 6 cm and we cut off from. Such pieces you
will need 19 pcs. These are future petals. Be sure to burn them.
edges over fire so they won’t fall.
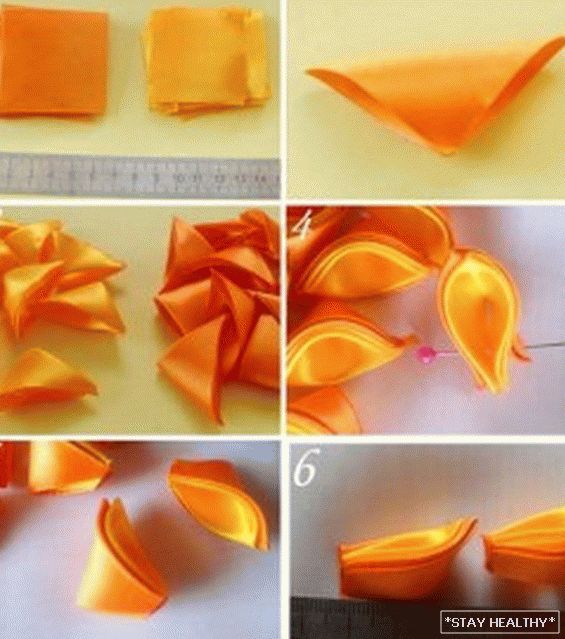
2. Now proceed to the formation of the petal. For this:
• take a piece so that the inside of the ribbon is on top, and
fold it obliquely in the center;
• Make sure that the ends that protrude make an angle.
at 90 degrees and had the same length;
• in the upper part of the segment you need to bend in the center;
• now fold the opposite part in the same way,
so that it lies on the lower segment;
• you have a petal, only from the wrong side;
• it must be fastened; for this purpose, thread into the needle and
the front of the petal to lay a couple of small stitches as possible
close to the edge.
3. The next two petals are formed in a similar way, but
you need to connect them with the thread on which the previous one is located
petal. Be sure to keep a slight overlap.
on them. It needs to be stitched to the middle.
4. But the third petal stitch to the end and tighten the thread,
collecting them into a tight ring. We fix it with several inverse
stitches. The thread can be cut. Spread the petals lightly,
density is not needed here.
5. In a similar way we form rings of 5 and 7 petals.
Leave small gaps in the ring. Subsequent must be
a little more than the previous one. Make sure the petals are
slightly raised up.
6. For the core of the rose, take the prepared piece of ribbon and
fold it, like petals. But at the same time make a folding under
as sharp as possible. Make the last turn of the tape slightly
free and sew thread.
7. Collect the flower:
• put the core of the combination of three into the center gap
petals and stitch them on the bottom of the thread;
• cut the bottom seal with scissors and immediately set it on fire;
• structures of 5 and 7 elements sew together in the middle and
without breaking the thread, insert the core into them;
• be sure to sew and glue them;
• we cut off the middle seal and burn it again by fire.
8. From a larger green ribbon in the same way.
form a pair of petals. Sew them together, but not tightly.
After sticking to the flower from the bottom or side, as prompted by your
fantasy. Rose kanzashi ribbons made with their own hands.
It will look great as a brooch, hairpin, rubber band or
hoop element. To do this, on the back side you need to stick a circle
from pink felt. And here they attach a pin or a rubber band to it, and
also for this basis, the rose is glued to the hoop.
Flower kanzashi tape do it yourself
To make it, take a tape of the same size. Can
make it colorful, and you can monotonous. And,
standard set for kanzashi and bead-heart.
This flower is made of two types
petals:
• rounded;
• sharp.
Having mastered the technique of production, which can be created
amazing and unique flowers and not only. Enough for that
will combine them in size and number of petals.
Step by step instructions for making rounded
kanzashi petals with tapes do it yourself:
1. Cut off a piece of tape so long as to be
square.
Important! The thinner the tape, the smaller
get a petal and a flower in the end. Therefore, for larger
products need to use wide tapes.
2. Fold it diagonally so that its angle is
down below.
3. Bend the left corner to the top. We also act with the right
angle of Now you have a diamond in your hands, which has a gap in the middle.
Turn him over to smooth face side.
4. Turn the workpiece slices to the right and bend the top and
lower angle of the figure to the center.
5. Turning the workpiece in half horizontally, you hide the corners.
6. Now you need to flash the resulting angle and straighten it. The edges
are fixed by thread, and the cuts are processed by fire. It can be done
a lighter or a burning candle.
7. Petal ready. Thus form another 5 pieces.
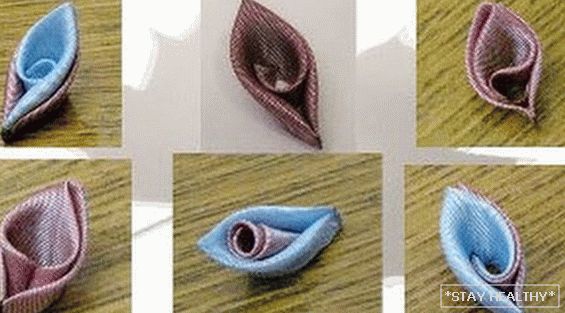
Step by step instructions for making acute
kanzashi petals with tapes do it yourself:
1. Отрезать ленту так, чтобы образовался square.
2. Fold the segment diagonally. And the resulting triangle
need a couple of times to fold in half vertically. Now you have
hands a small triangle, the edges of which need to be stitched with thread, and
trim angle.
3. Deploy the workpiece so that the edge of the future petal
looked down and was located on the left. The widest part of the workpiece,
which is on the right, we trim. And it must be done clearly
along a line that is parallel to the left side. Cut off part
cauterize.
4. Procurement ready. It now remains to do likewise.
5 more pieces.
Form the flower:
1. On a string we string alternately round and sharp petals.
After we have them in a circle and fix it in this position.
2. Now you need to disguise not too beautiful core.
For this we need a bead. If it has an eyelet for a thread, then
we sew. And if not, then you can besiege the glue.
3. Your flower is ready. Now it can be fixed on the barrette,
hoop or brooch. To keep it safe, use a piece.
thick fabric or felt in tone flower. It will need to be cut in
form a circle and glue to the product, and after drying, apply glue
on this circle and attach to the hoop or elastic band.
The technique of flower formation can be varied. And from this
will depend on what the output you get. Can
make a flower only from rounded petals, and it is possible – from sharp.
And not necessarily that it was a flower. It may be
an abstract figure or the same rainbow when petals are collected in
semicircle. And each petal is similar to the colors of the rainbow.