 Пн, 21 ноя 2016 Автор: Ксения Рахимова
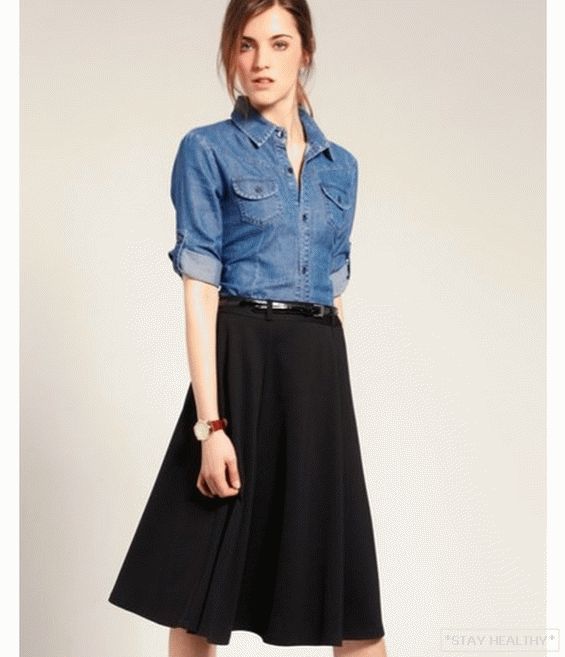
The sun skirt, like a little black dress by Coco Chanel, should
be in the wardrobe of every woman.
This skirt is associated with tenderness and attractiveness. Forms
Her airy and elegant. This textile decoration can give
narrow female hips roundness and hide excessive thinness.
The skirt of the figure skirt can also hide, if its length drops
to the floor. To sew a skirt with their own hands is simple. Today’s
master class is devoted to different styles of this skirt.
Contents
Simple sun skirt with elastic
The skirt of this style can be sewn without a pattern. It seems
impossible, but only at first glance. Fabric recommended
choose flowing and pleasant to the touch. And depending on the season
thick and warm or weightless and cool.
Материалы и инструментарий: ткань, резинка, ножницы,
tailor’s meter, chalk, pencil, rope, tailor pins,
sewing machine, thread to match, needle, iron.
Stage 1
Measured hips circumference and the desired length of the product.
Stage 2
The fabric used is necessarily pre-erased and
ironed. Then it doubles up on the desktop.
The material is cleaved with pins.
Stage 3
With the help of tailor’s chalk, pencil (or stick) with
rope draws a semicircle on the fabric. According to the above
the length of the small circle is half the size of the waist;
the length of the large circle is not measured. The length of the last lap depends
on the length of the product, that is, the longer the product, the longer the circle.
The length of the product is equal to the indent from the small circle.
In the center of the small circle is set the rope and secured.
A pencil with chalk is attached to its tip. In the tense position
rope can describe circles. Manipulating this state
draws the very small and large circles.
Be sure to make allowances for the elastic at the waist and side
1 cm seams, and 4 cm for the hemline, taking into account future hemming.
Stage 4
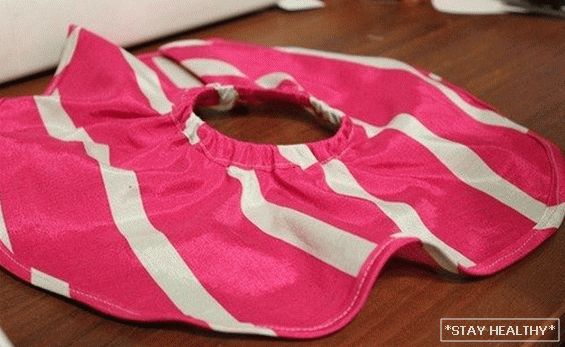
Work with a belt. Rectangular is cut out of material for it.
shape folded horizontally in half. Suitable width is
5 cm if the model is of medium height. Depending on fluctuations in growth
one way or another, the width of the belt is reduced or increased by
1 cm
The length of the belt is the length of the waist circumference plus 5 cm.
Stage 5
The belt is sewn at the edges. One narrow edge remains temporarily not
stitched to insert gum.
Stage 6
The skirt sews together the front and back on the sides. Then
You can sew on your own hand-made almost finished skirt
to a belt from seamy side.
Stage 7
The elastic band is inserted into the belt. Left hole sewn up
manually hidden stitch on the front side.

The skirt is ready!
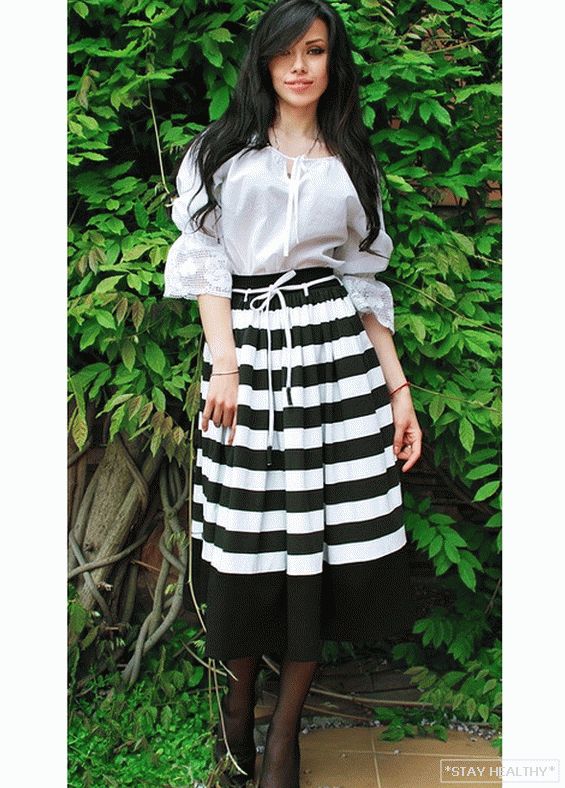
Skirt sun Asterisk do it yourself
The skirt is sewn in an interesting technique of petal connection. The form
Sun saved, but the technology is completely different. Image attached
mystery and unusual. Craftswomen will appreciate this option skirts with
16 wedges.
Материалы и инструментарий: ткань двух цветов, мел
tailor’s, ruler, large protractor, scissors, sewing machine,
thread to match, needle, tailor pins, iron.
Stage 1
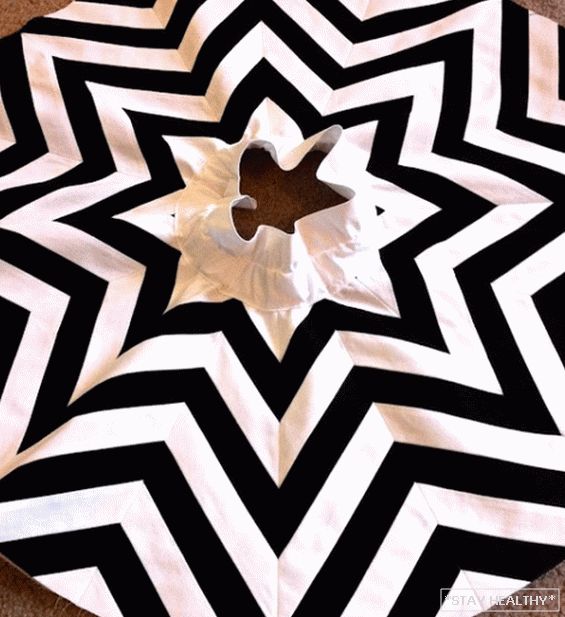
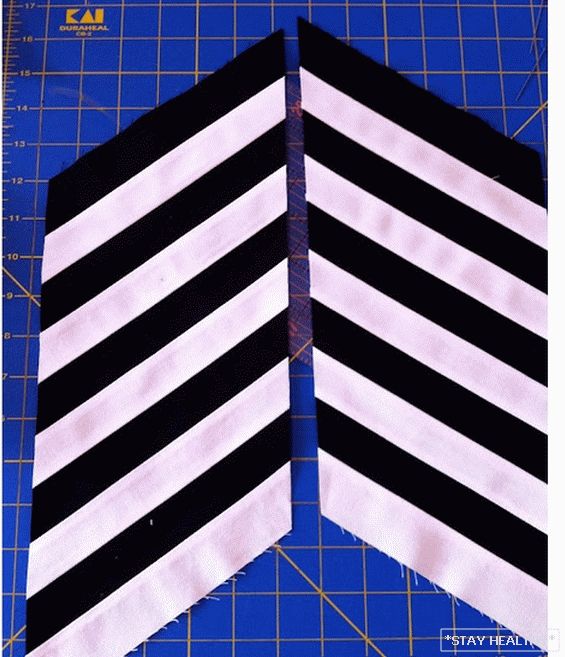
The skirt consists of 16 wedges. Each of them has in its composition
10 strips, which consist of 5 strips of the same color and 5 –
other. All strips are sewn at a 45 degree tilt angle.
degrees
Fabrics before work are washed in a washing machine, dried
and ironed. If this is not done, then the black fabric is ready.
product may dye slightly white fabric. it
it is important to prevent the initial stage of work.
Stage 2
Based on the length of the product, a decision is made on the number of strips.
on the skirt. There may be more than the figure. Counted
припуски в 0,5 – 1 cm
Stage 3
Stripes are cut from the fabric at a right angle (along the
threads) with lined chalk allowances.
Stage 4
Все полоски сшиваются между собой уже под углом в 45 degrees
The colors alternate.
On strips it is recommended to apply in advance strips with marked
protractor degree slope.
Stage 5
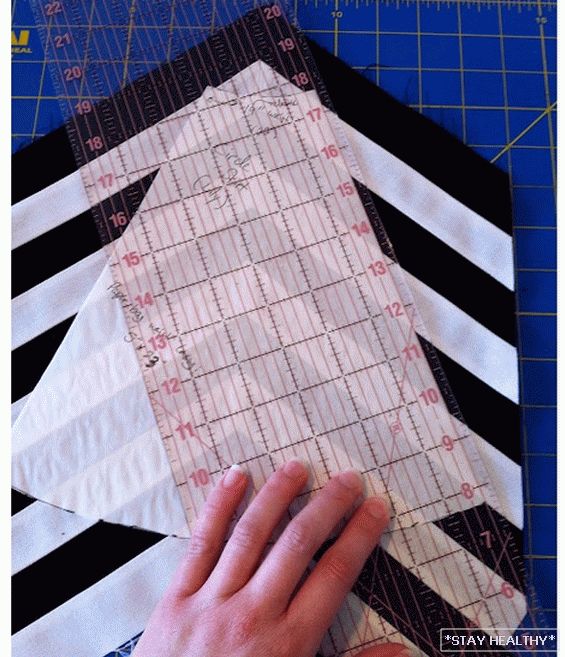
The two halves of the wedge are joined into one. The first wedge turns out
for a skirt-sun do it yourself.
Stage 6
By analogy, the remaining wedges are made. Folded
condition they resemble an asterisk.

Wedges are smoothed before general stitching into one product.
iron.
Stage 7
All wedges are connected in one product.
Stage 8
On the bottom edge, the fabric is folded and the hem is processed.
Stage 9
The folds of the wedges look good and show their shape.
To give the sun skirt a smooth wave, the bottom is sewn
skirt.
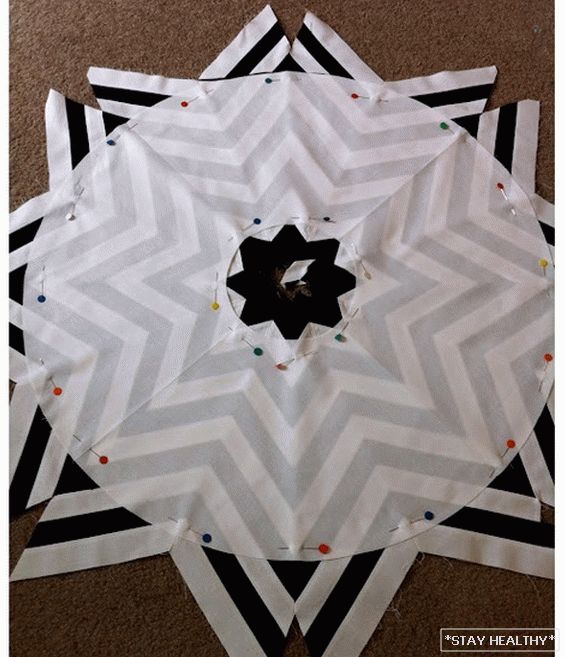
It is performed in a different technique. Two fabrics are cut out of the fabric.
half-sun shapes and stitched on the sides. Handled bottom. Bottom
the skirt is stitched to the main skirt according to the layout of the pins on
drawing
Stage 10
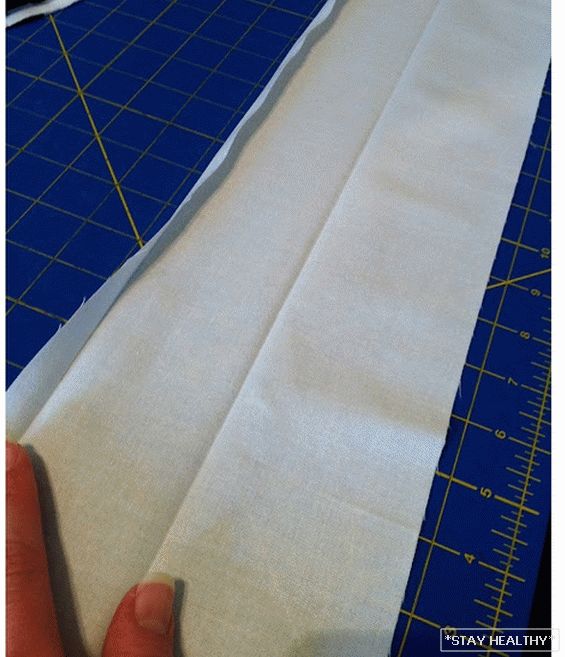
A belt is cut out of the material.
Stage 11
It folds in half horizontally. Iron recommended
iron allowances. The belt is sewn to the main product.
front side. One narrow edge not stitched for
future gum inserts.
For convenience, the belt can be pinned in advance with pins to
skirt sun with their own hands.
Stage 12
An elastic band is inserted into the belt. Left hole sewn up
manually hidden stitch.
Stage 13
The finished product is ironed.
Skirt sun zipper do it yourself
This skirt is cut and sewn by any of the above techniques.
The zipper stitching feature arises in the final stages.
Materials and tools: fabric, secret zipper, scissors,
ruler, thread to match, sewing machine, iron.
Stage 1
In the description of the materials there is no gum. It is not required, since
work comes with a secret zipper.
In the already familiar stages of the fabric is sewed skirt-sun
lengths
Stage 2
The belt is sewn to the skirt. At first with pins he makes fun of
sewn on the main product and on the sewing machine with a narrow stitch “1 mm
от края» на front side.
Stage 3
The zipper itself is inserted into the side slit of the skirt along the length of the zipper.
She makes fun of pins. The product is worn per person and
The convenience of the lock position is checked in advance.
Stage 4
Then на ткани вдоль расположения молнии делается подгиб на
seamy side. Special foot for sewing in zippers
stitched.
The operability of the mechanism is checked.
Stage 5
A button is sewn on the upper part of the zipper. She doesn’t
will allow unexpected release of lightning during movement.
Skirt zip ready!