 Пт, 06 май 2016 Автор: Ксения Рахимова
The image of the bunny is familiar to everyone since childhood.
He is found in every cartoon, children’s film, books for
little ones.
A lively bunny causes pleasant feelings and emotion.
Because in the world more toys are made in the image
this animal.
Of which only hares are made: faux fur,
plush, paper, bast, plastic and so on.
The symbol of this forest miracle is present on every Christmas tree.
and in the Easter basket.
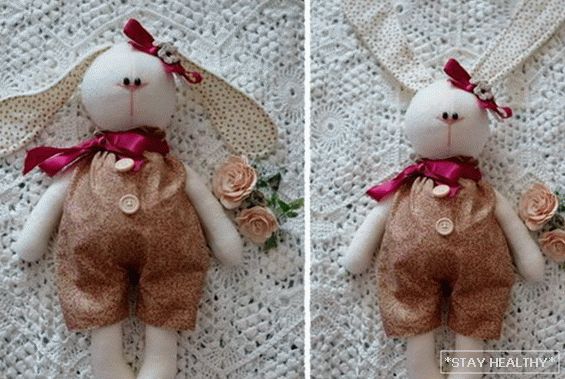
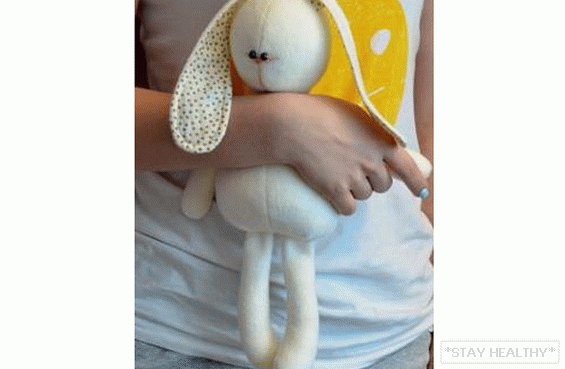
Today’s master class is dedicated to this animal.
Hand-crafted from the fabric, it will cause no less joy in
baby than alive.
For making a little adorable bunny
You will need the following materials:
• Fleece (it is better to choose a milky color);
• Fabric on ears and overalls (it is desirable to choose different flowers,
but with a good tone combination);
• Synthetic filler;
• For jewelry: ribbons, buttons, elastics, beads
А также: швейная машинка, нитки в тон, ножницы,
needle tailor meter.
Contents
Stage # 1
Pattern
The specified pattern can be printed through the printer or draw
right from the monitor screen, attaching a sheet of paper to it. Pattern
designed so that the future toy is 35 cm in height.
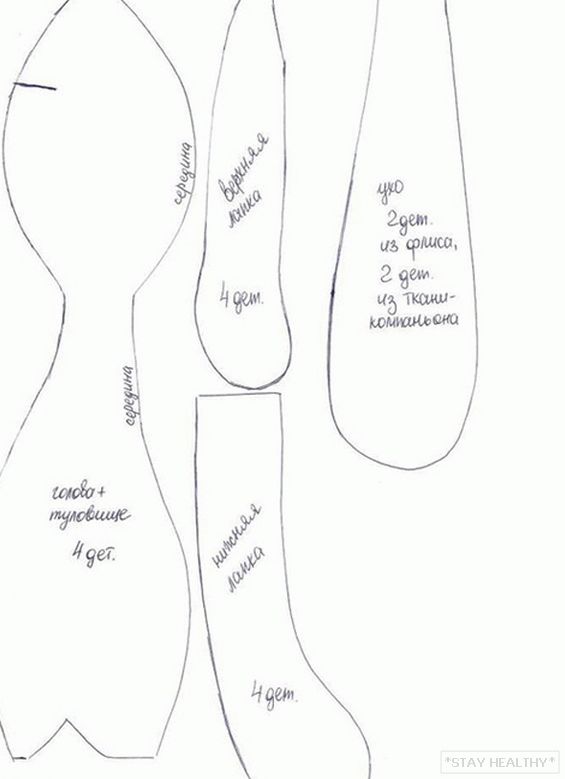
Pattern разрезается на бумажные детали. They are indicated
required quantity. Parts with a strength of 4 are mirrored
and in pairs. Pattern не учитывает припуски, потому при кройке нужно
make them. Width allowances – 5 mm.
Details are laid out on the fabric. Then tailored to suit
allowances.
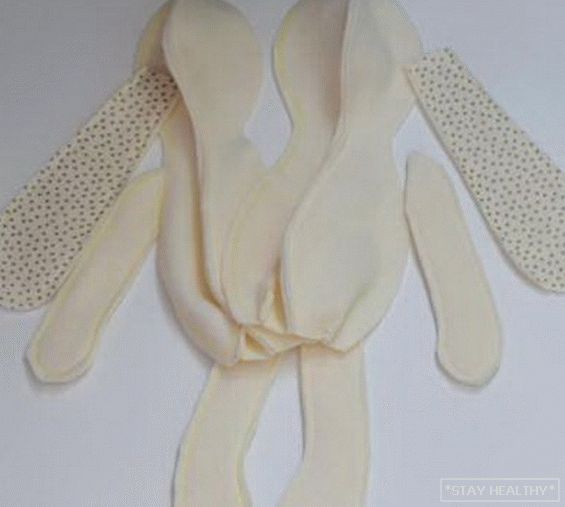
Stage 2
Stitching process
In the middle seam stitched details of the body. The seam runs on
seamy side. It turns out the front and rear. Further
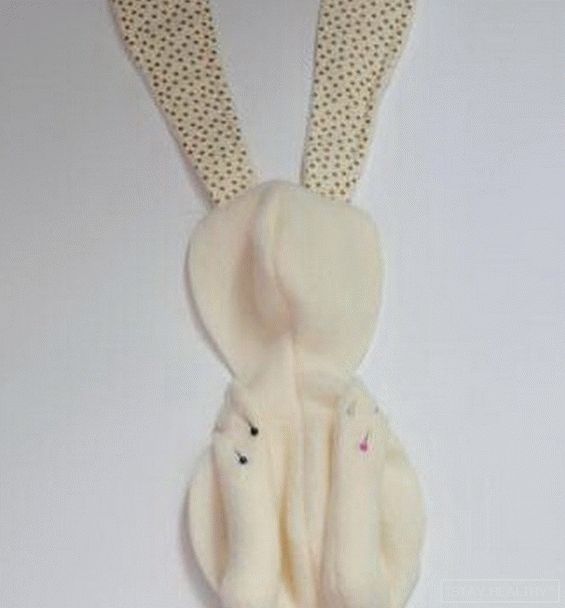
ears, hands and feet are scribbling. In relation to the ears there
feature when, after stitching together two parts, they turn out
on the front side. Drain on this side 5 mm from the edge.
This will give the ears the visual depth of the ear.
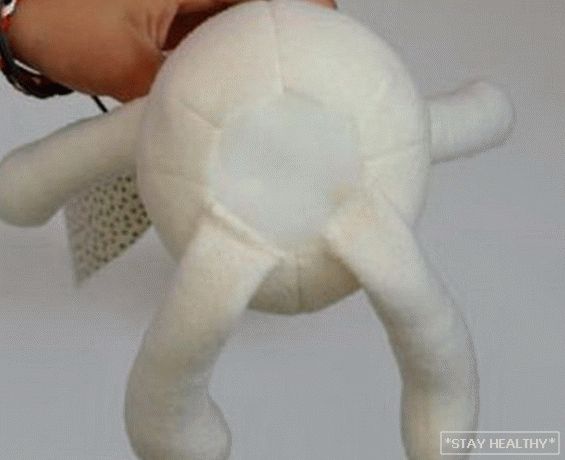
Stage 3
Stuffing paw filler
Все лапки уже вывернуты on the front side. Pens and feet
Stuffed with synthetic filler strictly 3/4. Conditionally
saying, the “tops” remain empty.
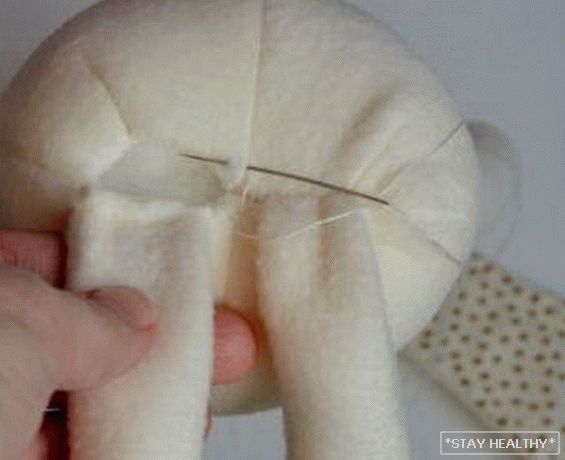
To any of the parts of the body (front or back) sewn
ears. The distance from the middle seam is 1.5 cm in both directions.
Further прикалываются и пришиваются ручки. There is no indent from the neck.
Fun and sewn legs. The distance from the middle is
0.5 cm in both directions.
On the seamy side, the front part of the body connects to
back. Not cut the cut left at the feet, through which then
изделие будет вывернуто on the front side. When stitched and
turned out, the toy through the slice is packed with synthetic
filler.
The cut is stitched up manually by a secret seam. Convergence of tucks
observed.
Stage 4
Face modeling
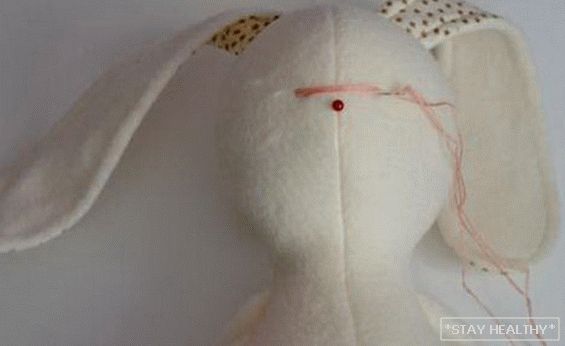
The spout is embroidered manually in three threads. Its location in advance
marked with an inserted needle. The process starts at the top. In the end
You can lay a strip of thread 1-2 cm vertically down, emitting
a kind of hare mouth.
Toys have such a feature that the size and shape of the nose, the eye
directly affect facial expression (muzzle). Therefore follows
experimentally reveal their best location using
tailors needles, and then – sew eyes and nose.
Stage 5
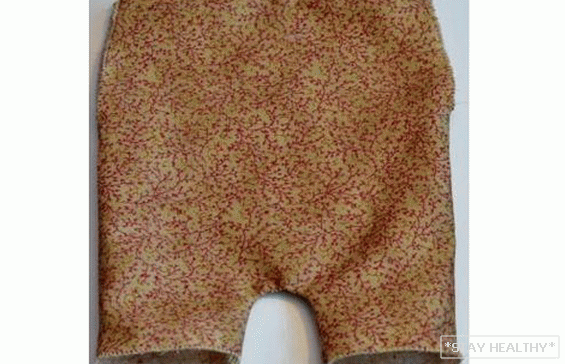
clothing
Fabric for future clothing before cutting
to wash If you then have to wash in the finished state on
the fabric may shrink. Depending on the fabric she
up to 30% is possible. This is a very big indicator. And after washing
The fabric, of course, is smoothed with an iron. It is recommended to choose
American cotton. It holds color well when exposed
temperature, weakly stretches along the common thread and diagonal, has
good density, weakly fray on sections.
The bunny is taken measurements for sewing overalls: waist girth,
product length from neck to legs +4 cm for shorts. To waist circumference
4 cm + 2 cm are added for allowances.
From the hand is drawn on the fabric approximate shape and cut. Height
products will be approximately 20-22 cm. Time will be saved if
cut the pattern on the folded fabric twice.
Top cut, side and bottom – processed overlock
line. If there is no overlock on hand, then a sewing machine can be
configure under similar parameters. To this end, the width increases.
stitch to the maximum, and the length – to the minimum on the most simple straight
line.
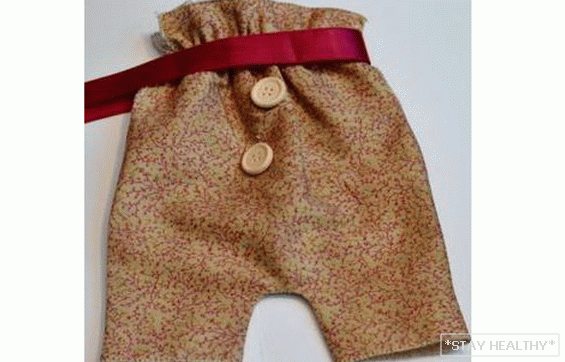
From the top edge down retreat 3 cm and sewn gum on
circle. The girth of the neck of the toy with a rubber band without tension is measured in advance.
And the elastic band is sewn already in a tight state. For
convenience is recommended to use the help of tailors needles and
chop them up with rubber tension. Stitch gum special
stitching for stretching products. It should make a beautiful build.
Stage # 6
Decoration
At this stage, the jumpsuit is worn with a bunny. In the neck
tied satin ribbon on the bow. You can sew a pair on your chest
buttons. The head can also be decorated with a beautiful bow with
flowers.
That turned out wonderful children’s toy. In a pinch, by her
You can decorate the interior of the nursery or kitchen. With a bunny, you can
play, take with you to bed. You can offer girls to sew
разнообразную одежду для игрears. And if the hare gets dirty – its
можно и в стиральной машинке to wash Thing will not spoil.
Synthetic filler and fleece are quick-drying.
materials.